Building a drawer for my SUV car camping setup
I upgraded my SUV car camping setup by installing a drawer for my gear! Check out how I was able to build this.
It's been nearly two years since I originally built the bed platform for my 2020 Hyundai Tucson. Since then I have taken it on so many adventures!
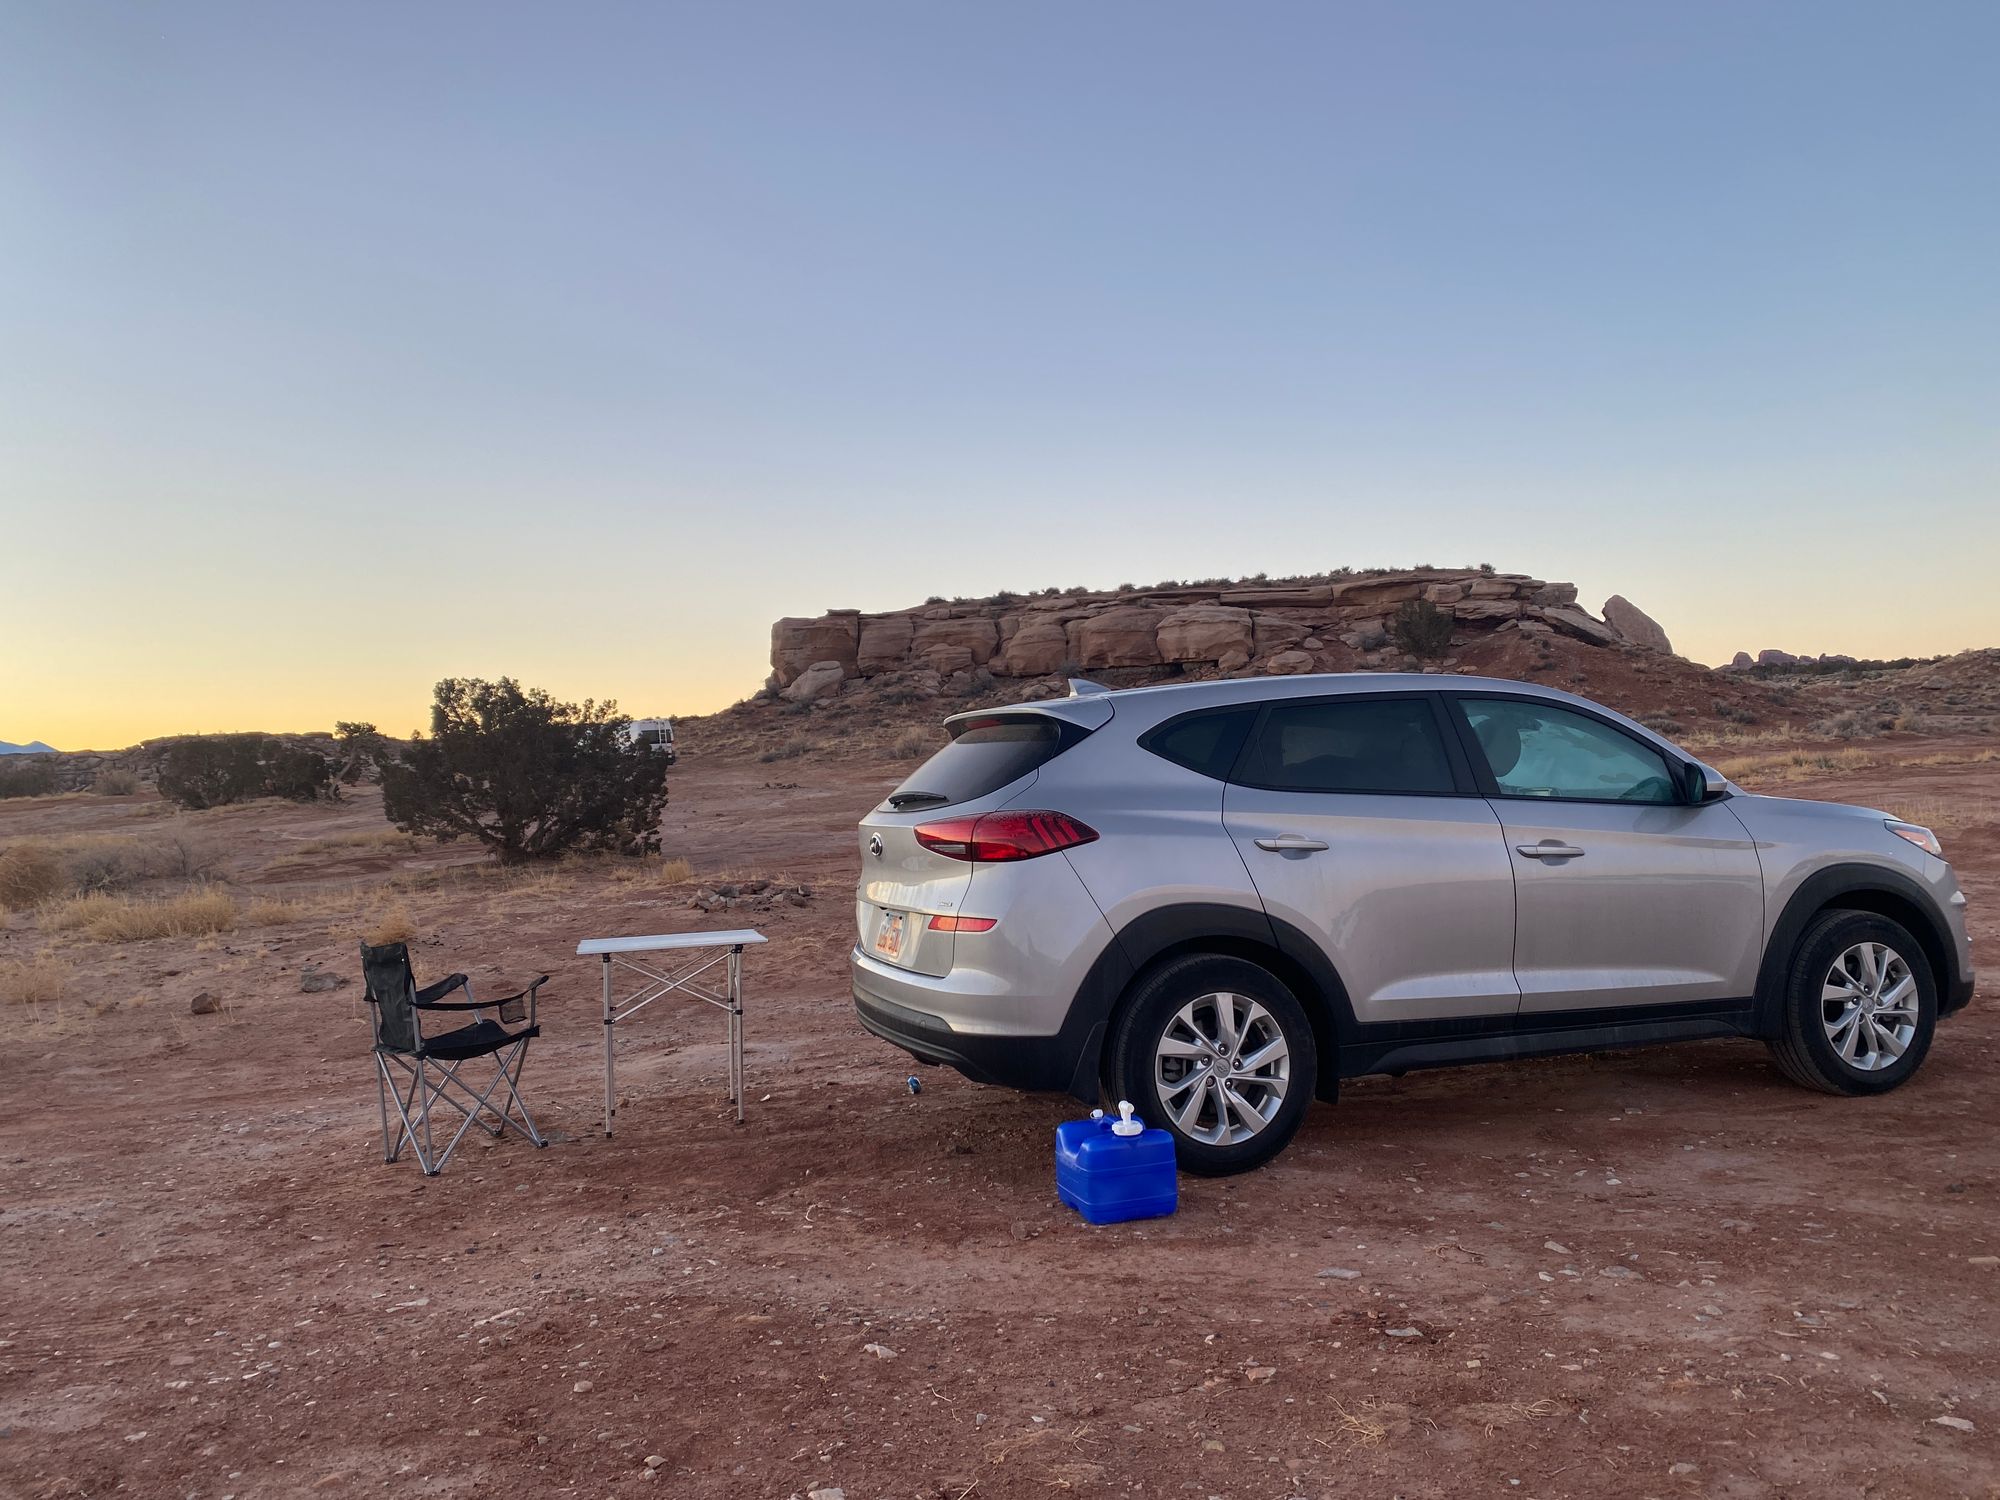
As time has gone on, I have accumulated pieces of gear that make car camping more enjoyable. This gear really adds up though, and you need to have places to store them. For the longest time, I just used plastic totes to hold various bits of gear. This works great and is super cheap! In fact, I am going to continue to use the large tote for storing most of my food.
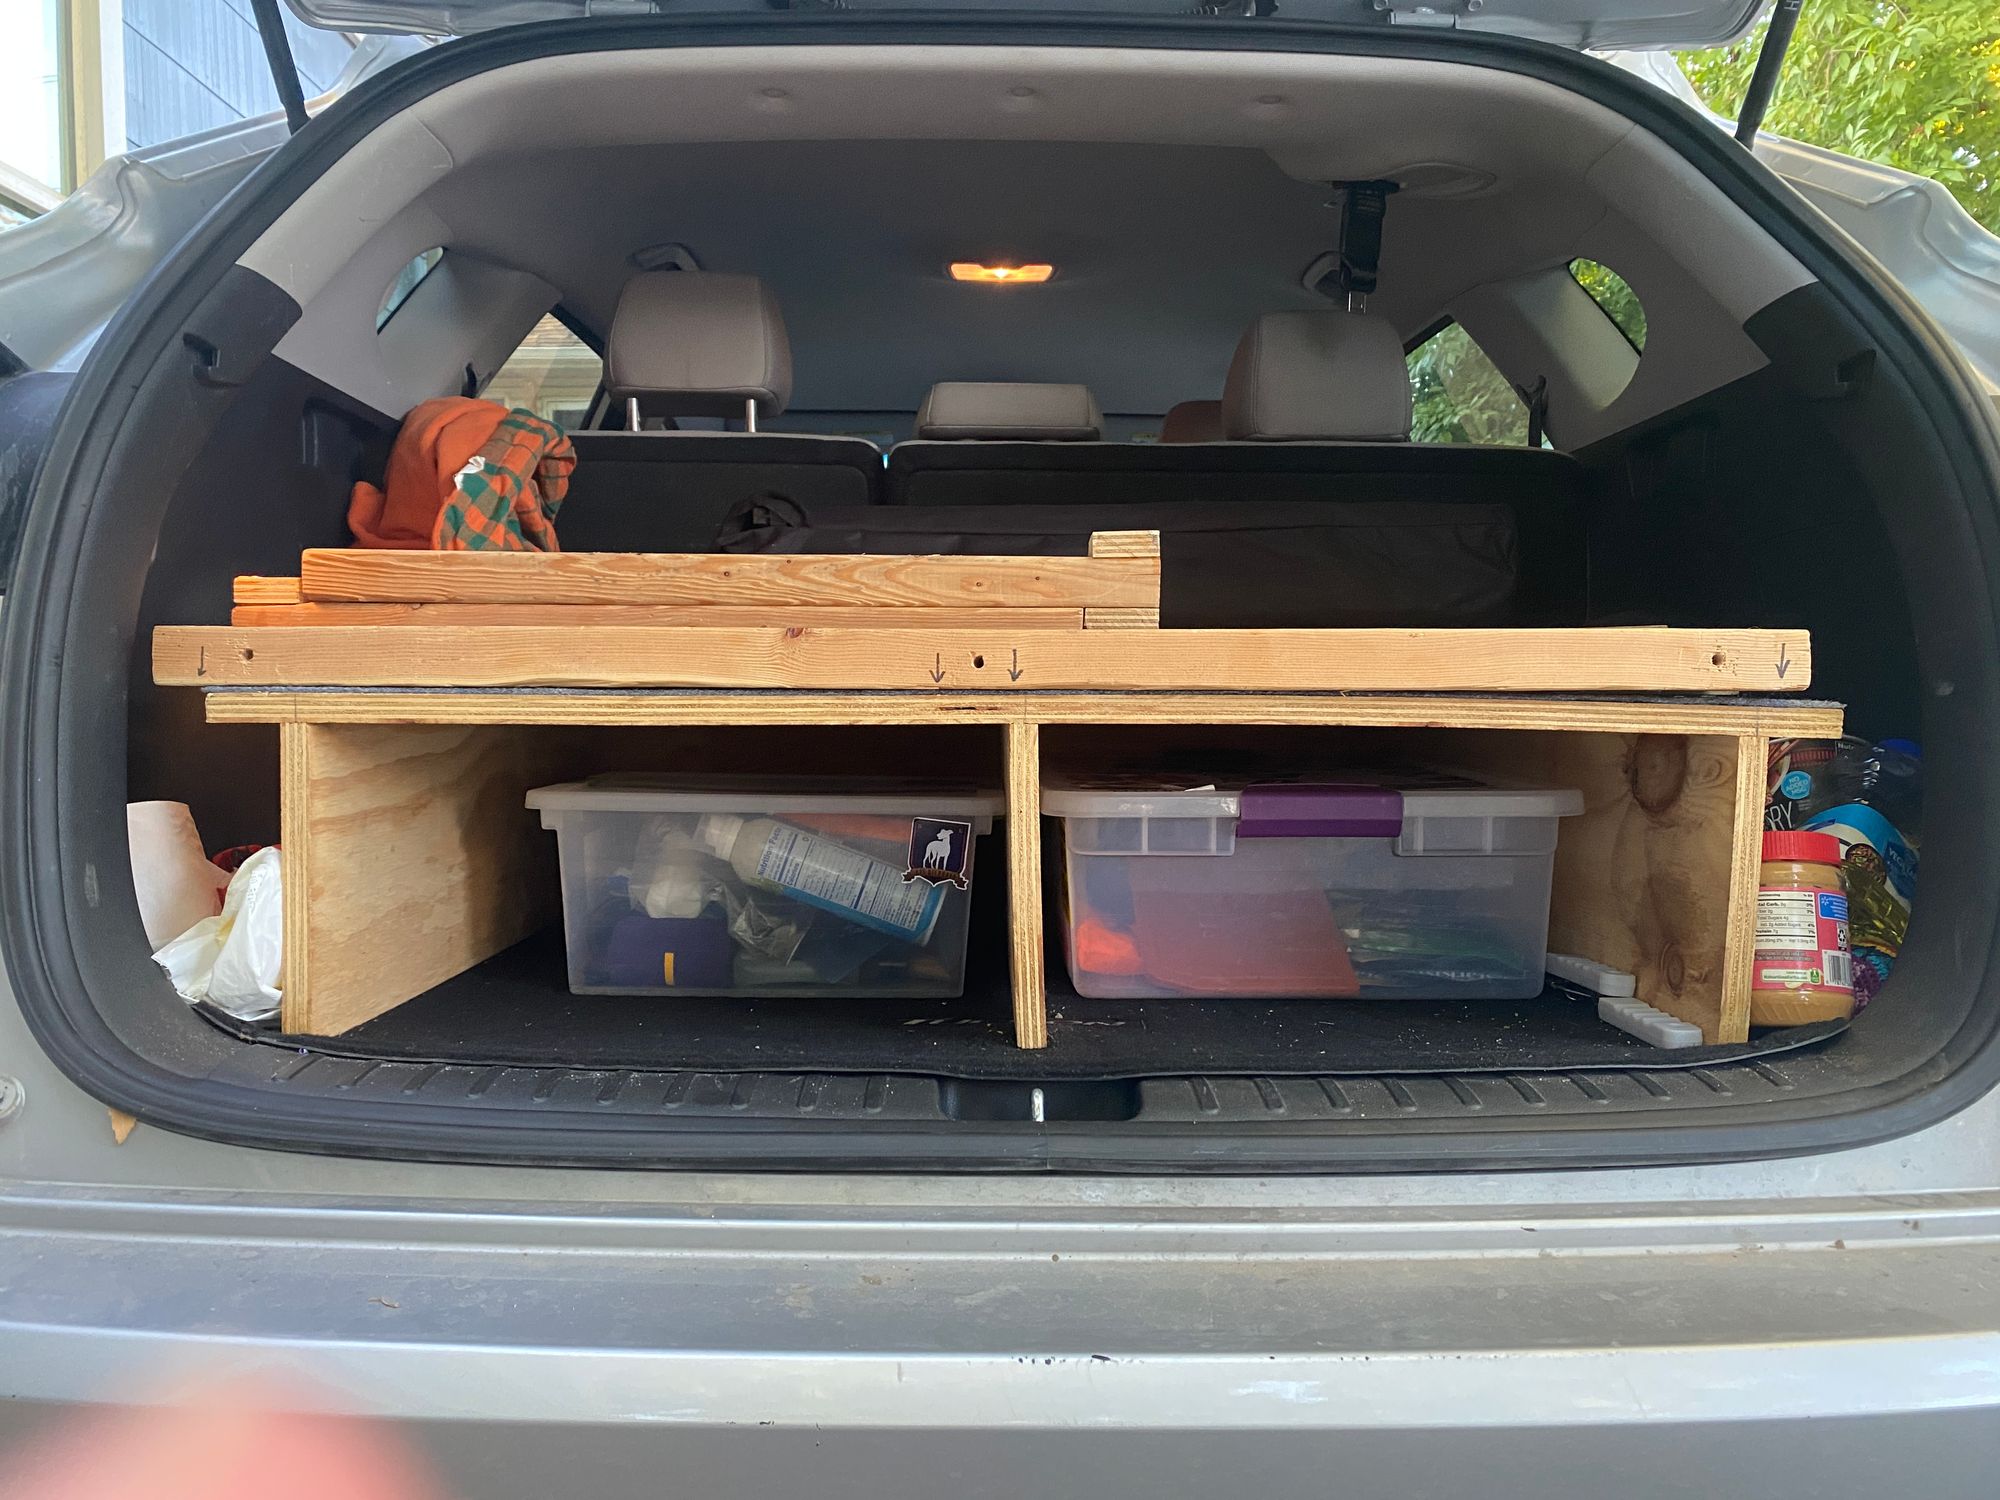
Still, I was wanting an upgrade – specifically on the left side. I only have a small tote over there, and other pieces are just loose. I had been considering the idea for a while, and I finally committed to building a drawer for my SUV car camping setup. It was time for a DIY project 😤🔨
For another look at this process, check out my YouTube video!
The Design
With any project, it is super important to thoroughly plan. I am FAR from a woodworking expert, so I attempt to make up for that with extensive planning (Don't worry I still made mistakes more on that later...). I started by taking the back piece of my car camping build out of the car, flipping it upside down, and measuring where the drawer would be installed.
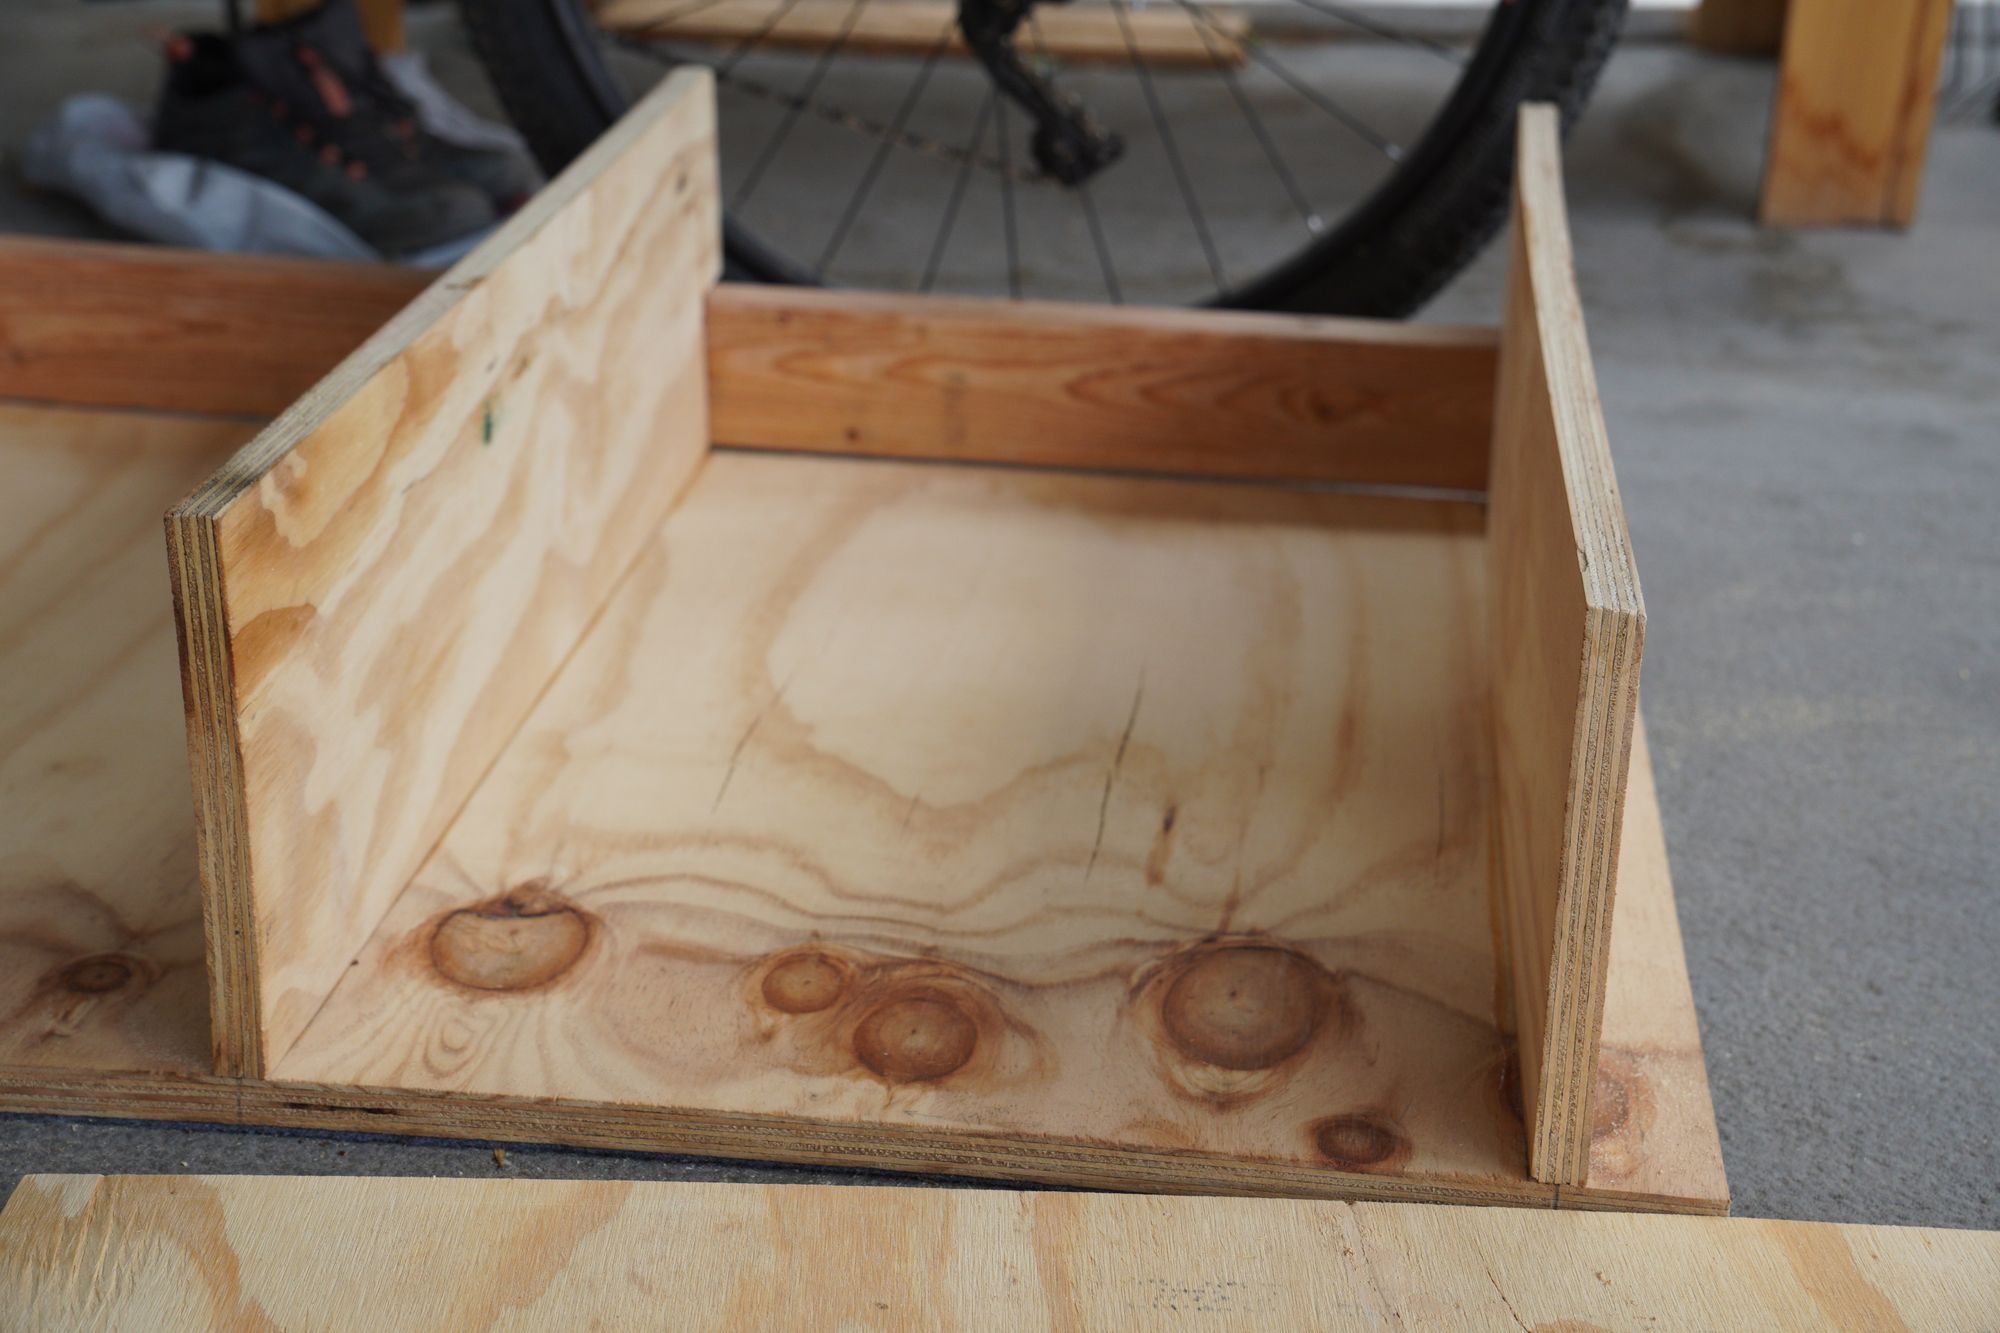
When upside down, the right side is where the drawer is going to go (left side when it's not upside down)
I measured SO many times. This was the crucial step that would determine how large the drawer would be and how much wood I needed. I recorded these measurements as I sketched out a design for the drawer.
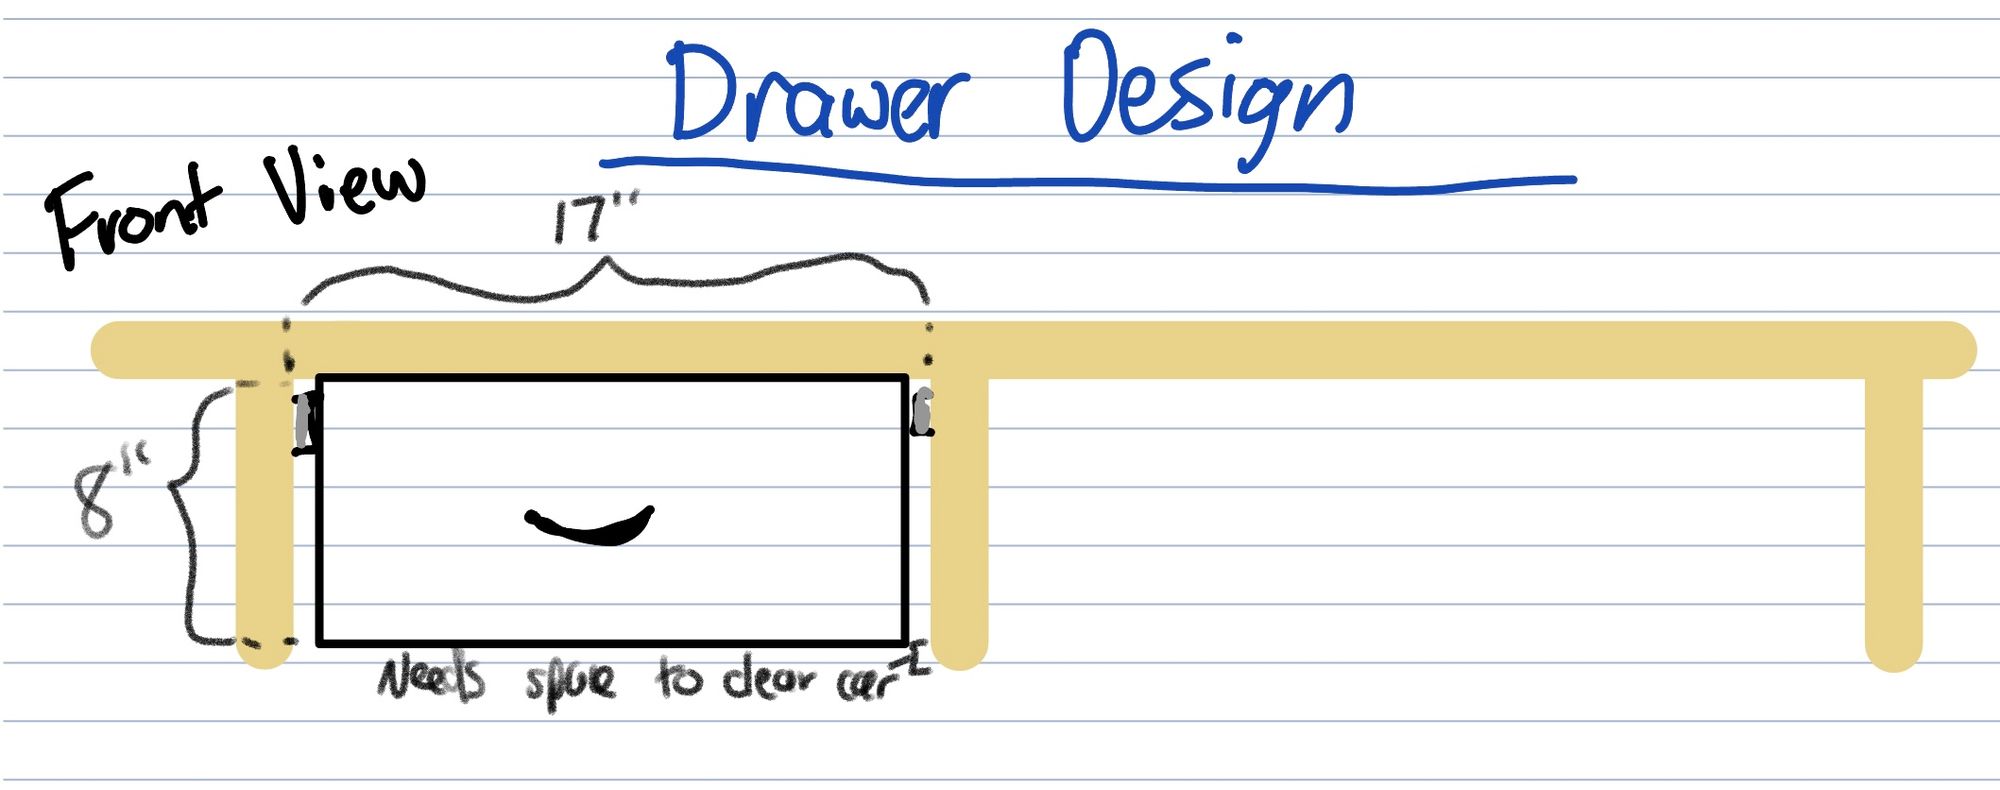
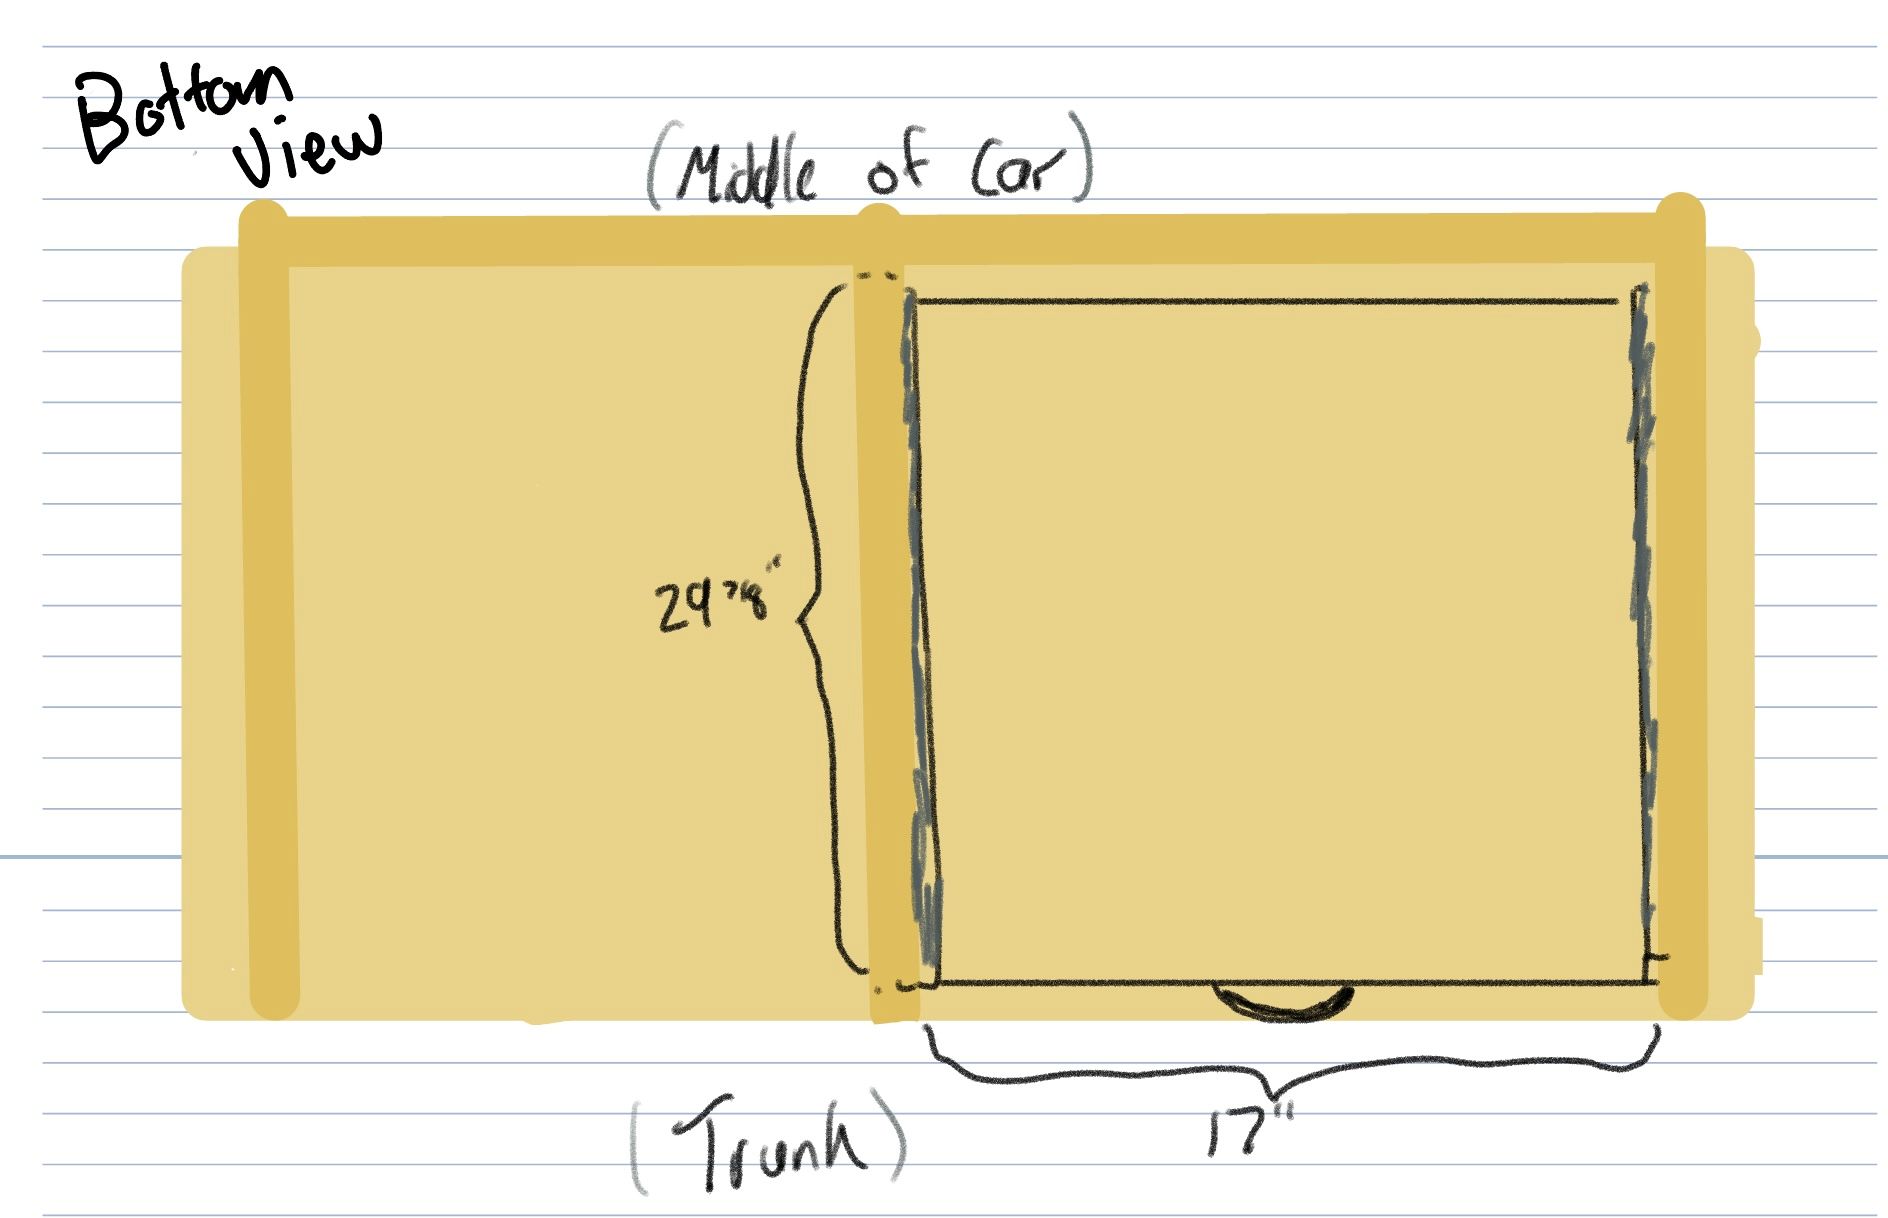
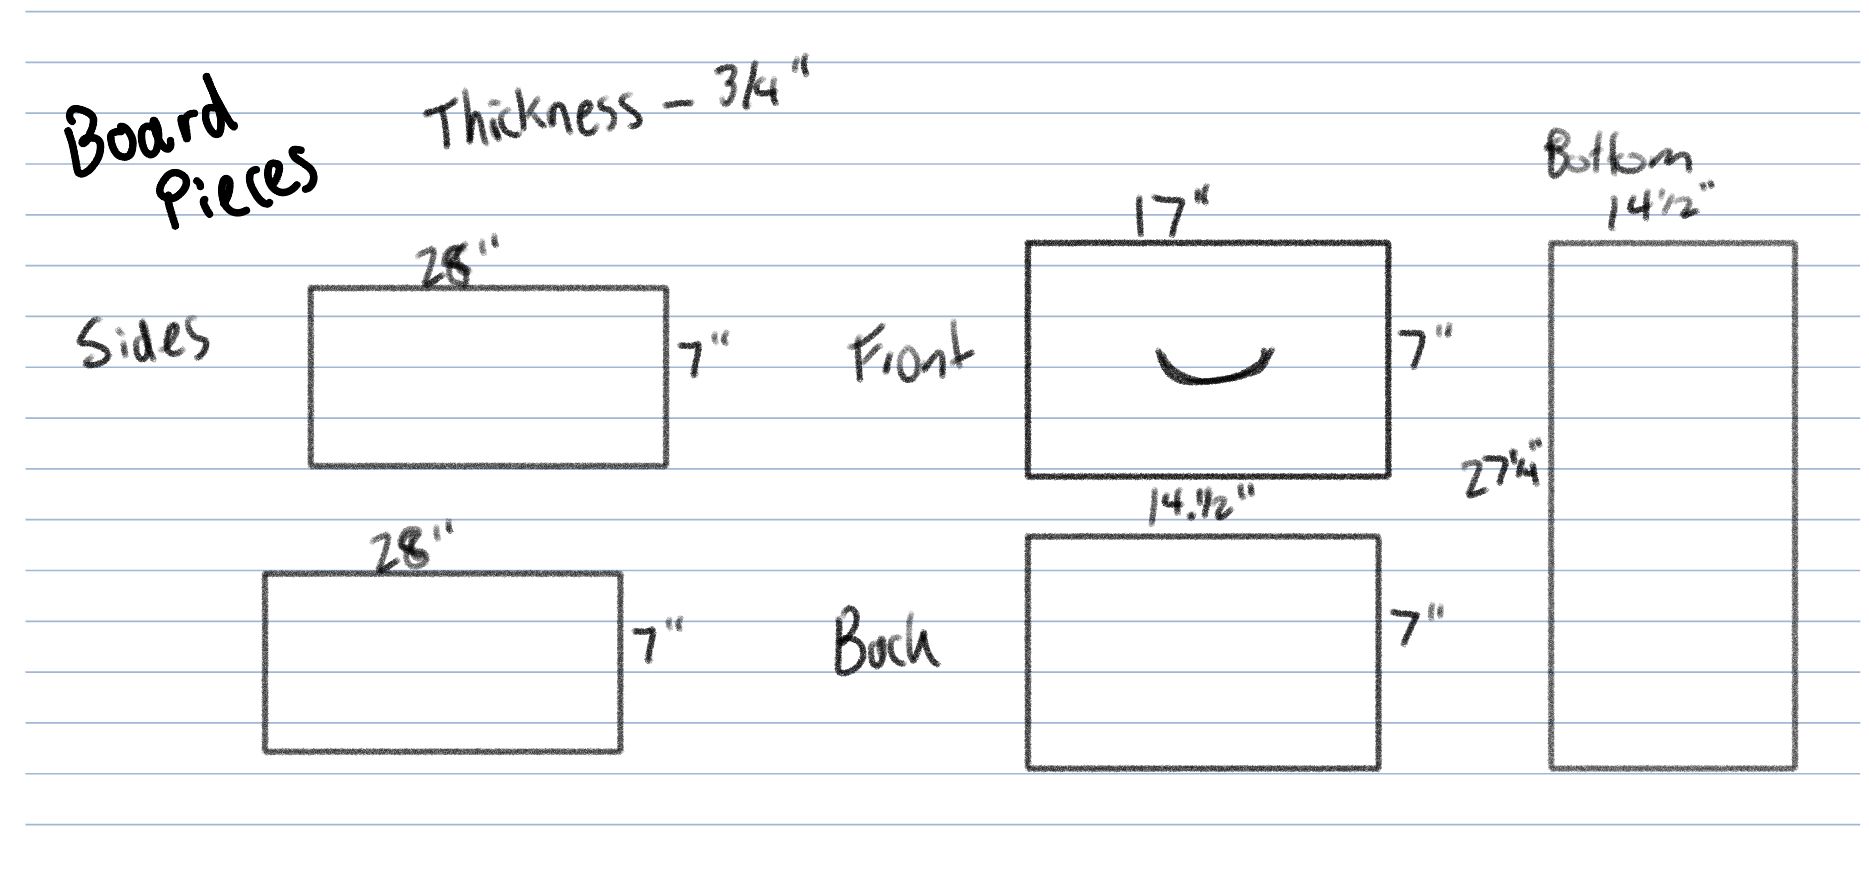
My sketches I drew up for the design
As with my car camping build, I was focused on simplicity and usability here. The whole drawer was going to be made out of plywood. I also wanted as much space as possible, while avoiding any headaches of building something too big that wouldn't fit. Here are a few key points in my design I want to highlight
- The front drawer piece is larger than the rest of the drawer to fill the opening on the platform
- There needs to be a 1/2" of space on each side to accommodate the drawer slides
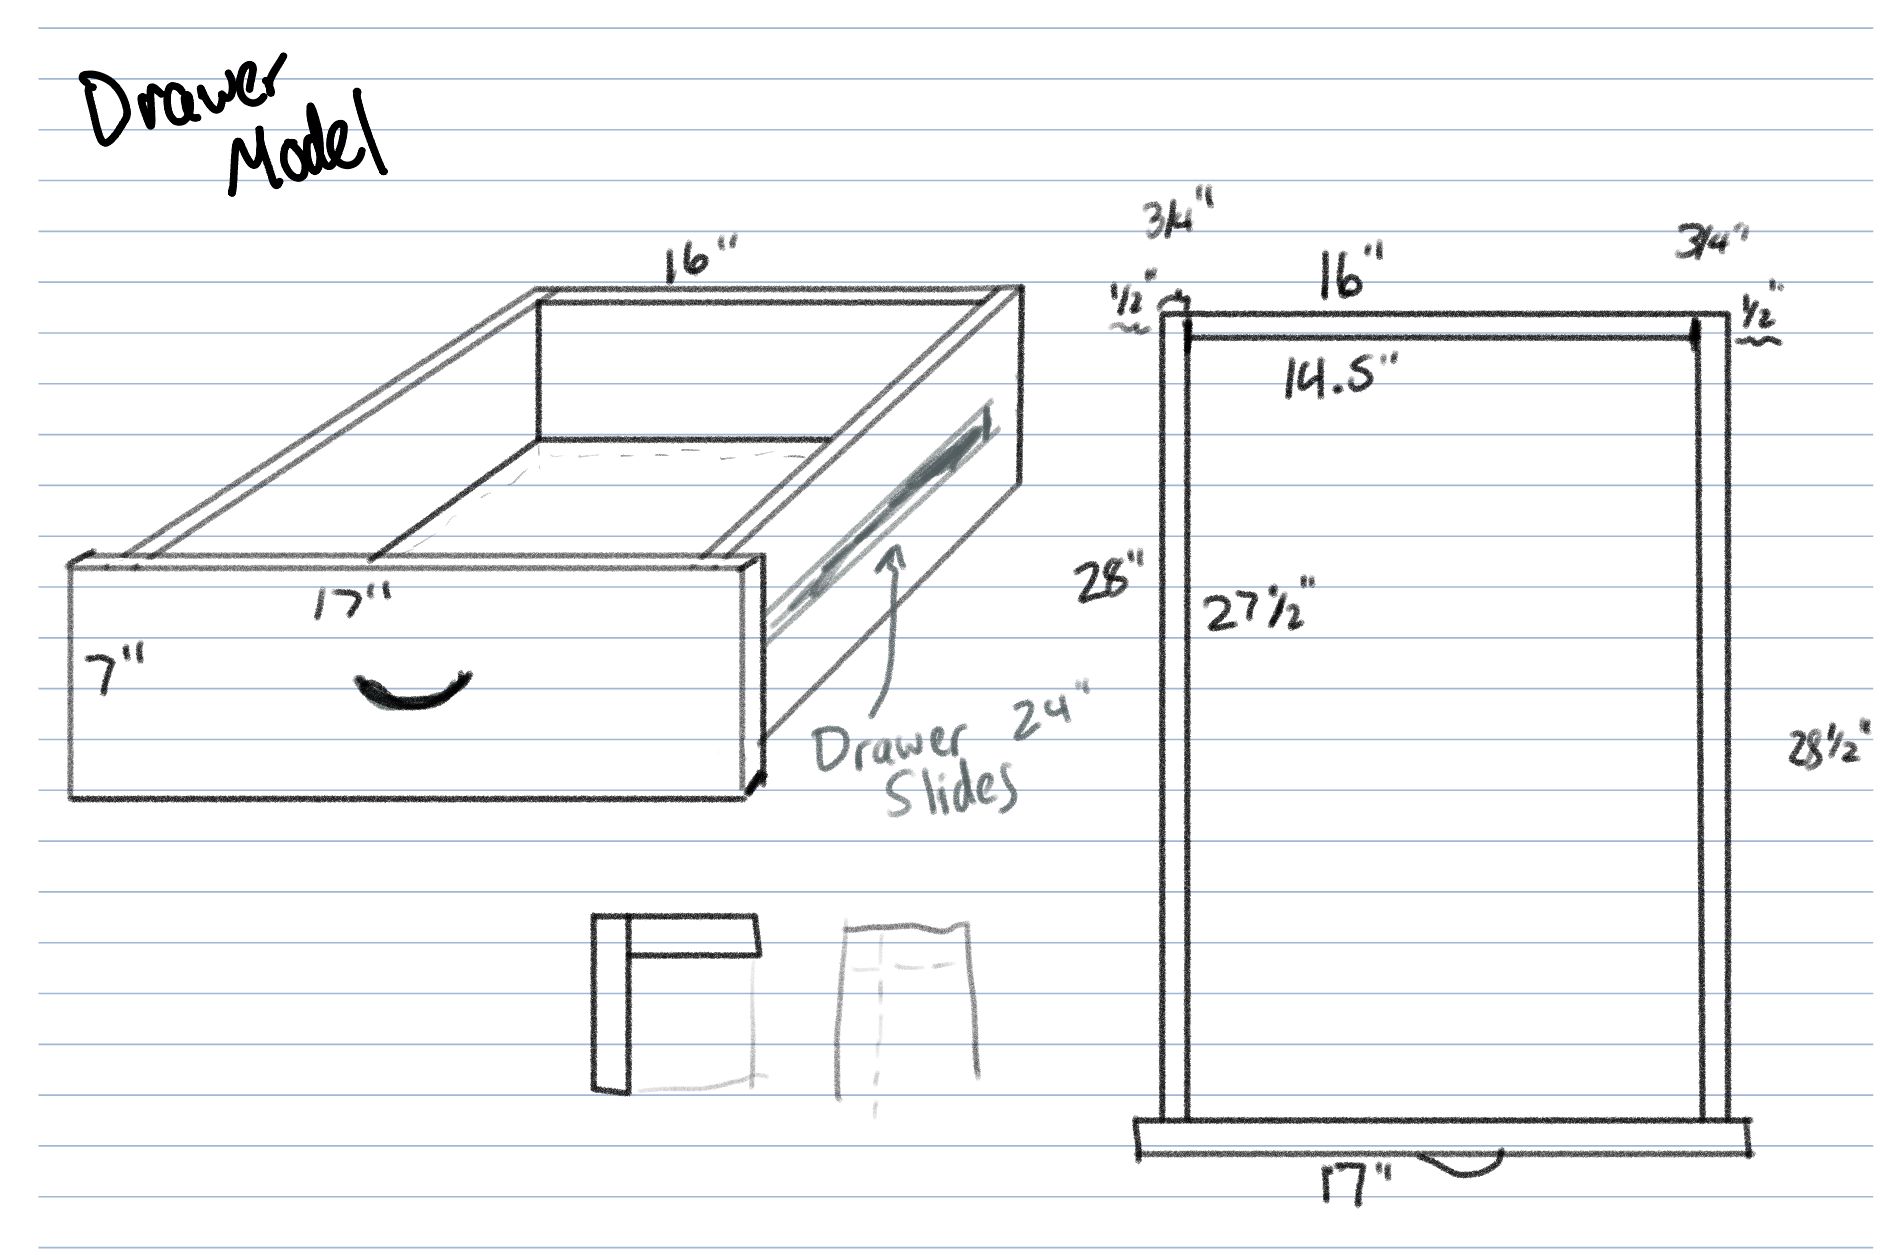
- The drawer is 8" tall, whereas the space is 9". I wanted some wiggle room on the top and definitely on the bottom. If the drawer was flush against the trunk of my car it might not have been able to pull out.
- I wasn't sure what drawer slides to get so I went with 24" which seemed to be the largest available at the store near me. I probably should have gotten closer to my 28" drawers, but it seems to be working so far.
Now that the design was done, I was ready to head to the store for supplies. Here is everything I bought or already owned:
Necessary Supplies
- 3/4" BC Plywood
- 24" drawer slides
- 1 1/4" Pocket Hole Screws (for 3/4" wood)
- Pocket Hole Jig and Pocket Hole Drillbits
- Drill
- Circle Saw
- Wood Glue
Optional Supplies
- Wood Filler
- Teak Oil + Stain for color and protection
- Electric Sander
The Build
After purchasing the supplies, I got to work. The first step was carefully measuring and cutting. I wasn't too worried here as I have experience with this from a few projects.

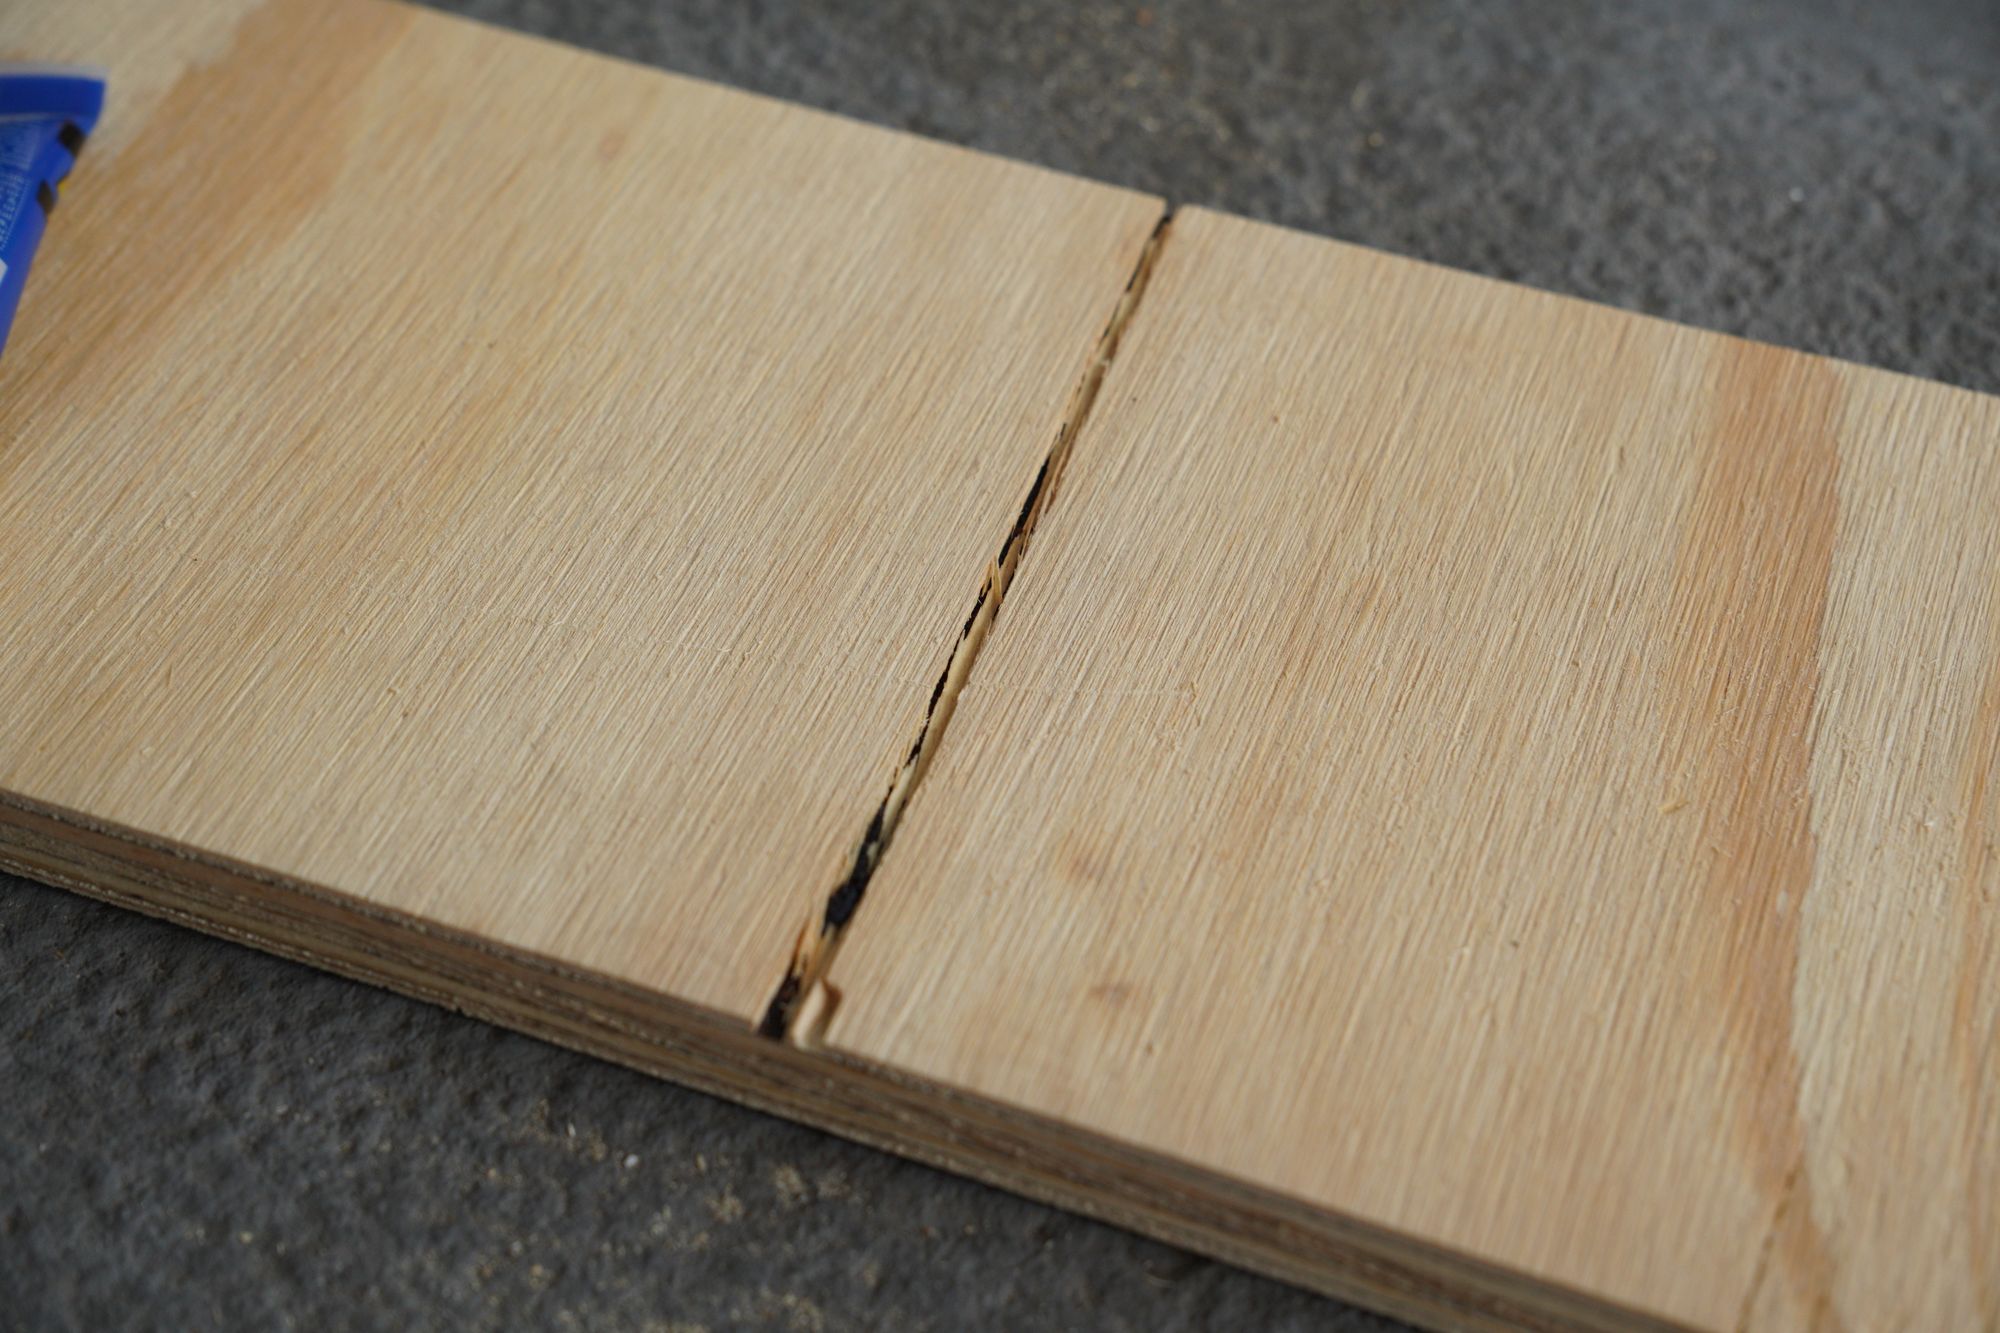
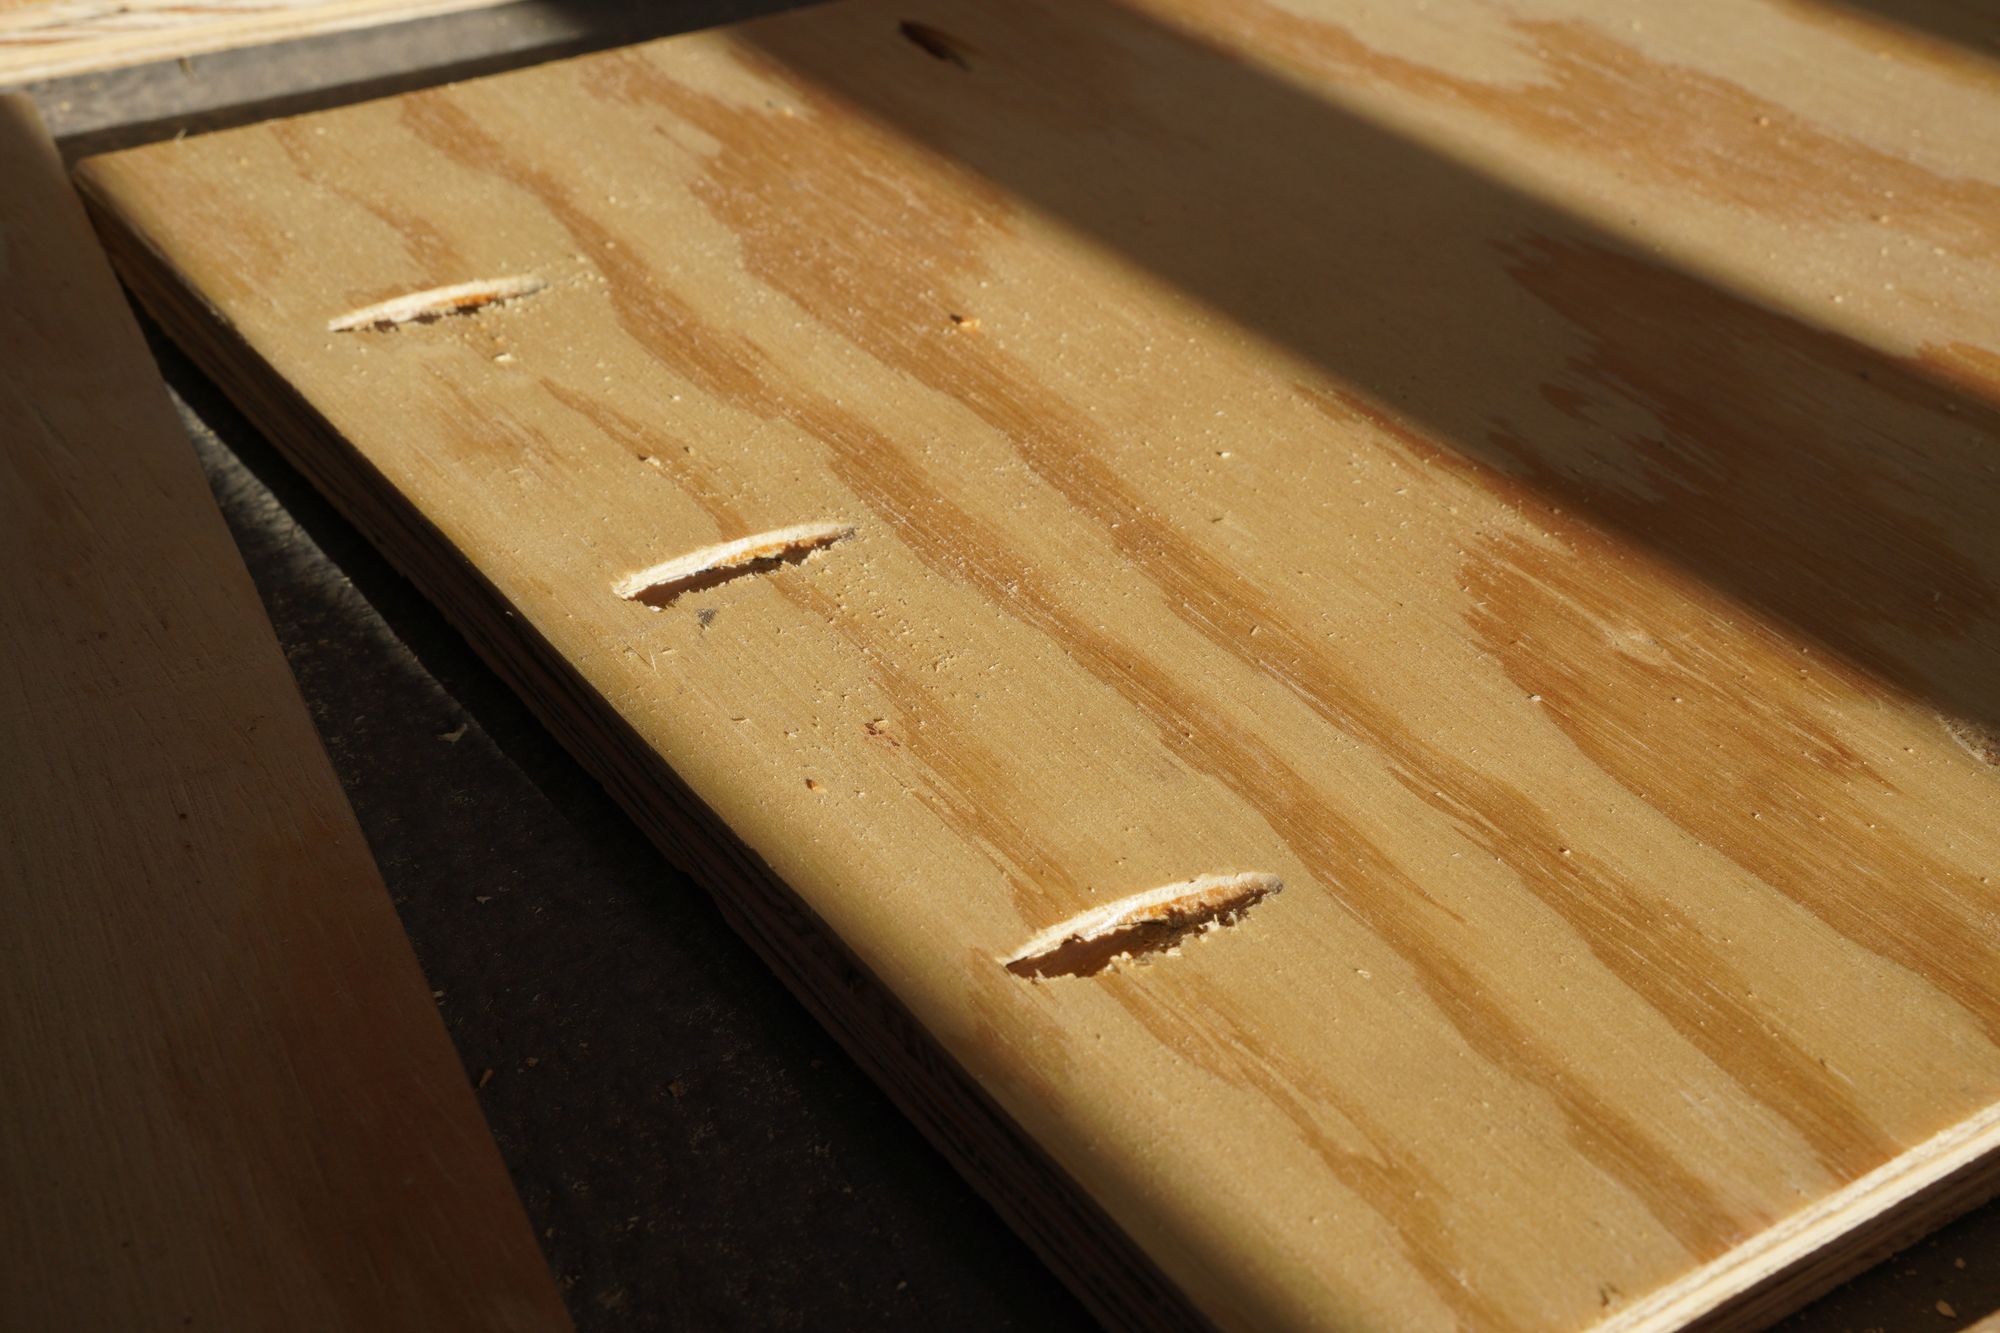
After cutting out the plywood, I noticed some imperfections on the bottom of the plywood. This was my first minor mistake. You should examine both sides of the wood when you are buying it, and when you are cutting it.
The imperfections were a few minor gouges which shouldn't affect the integrity of the board itself. Still, it would have been nice to avoid.
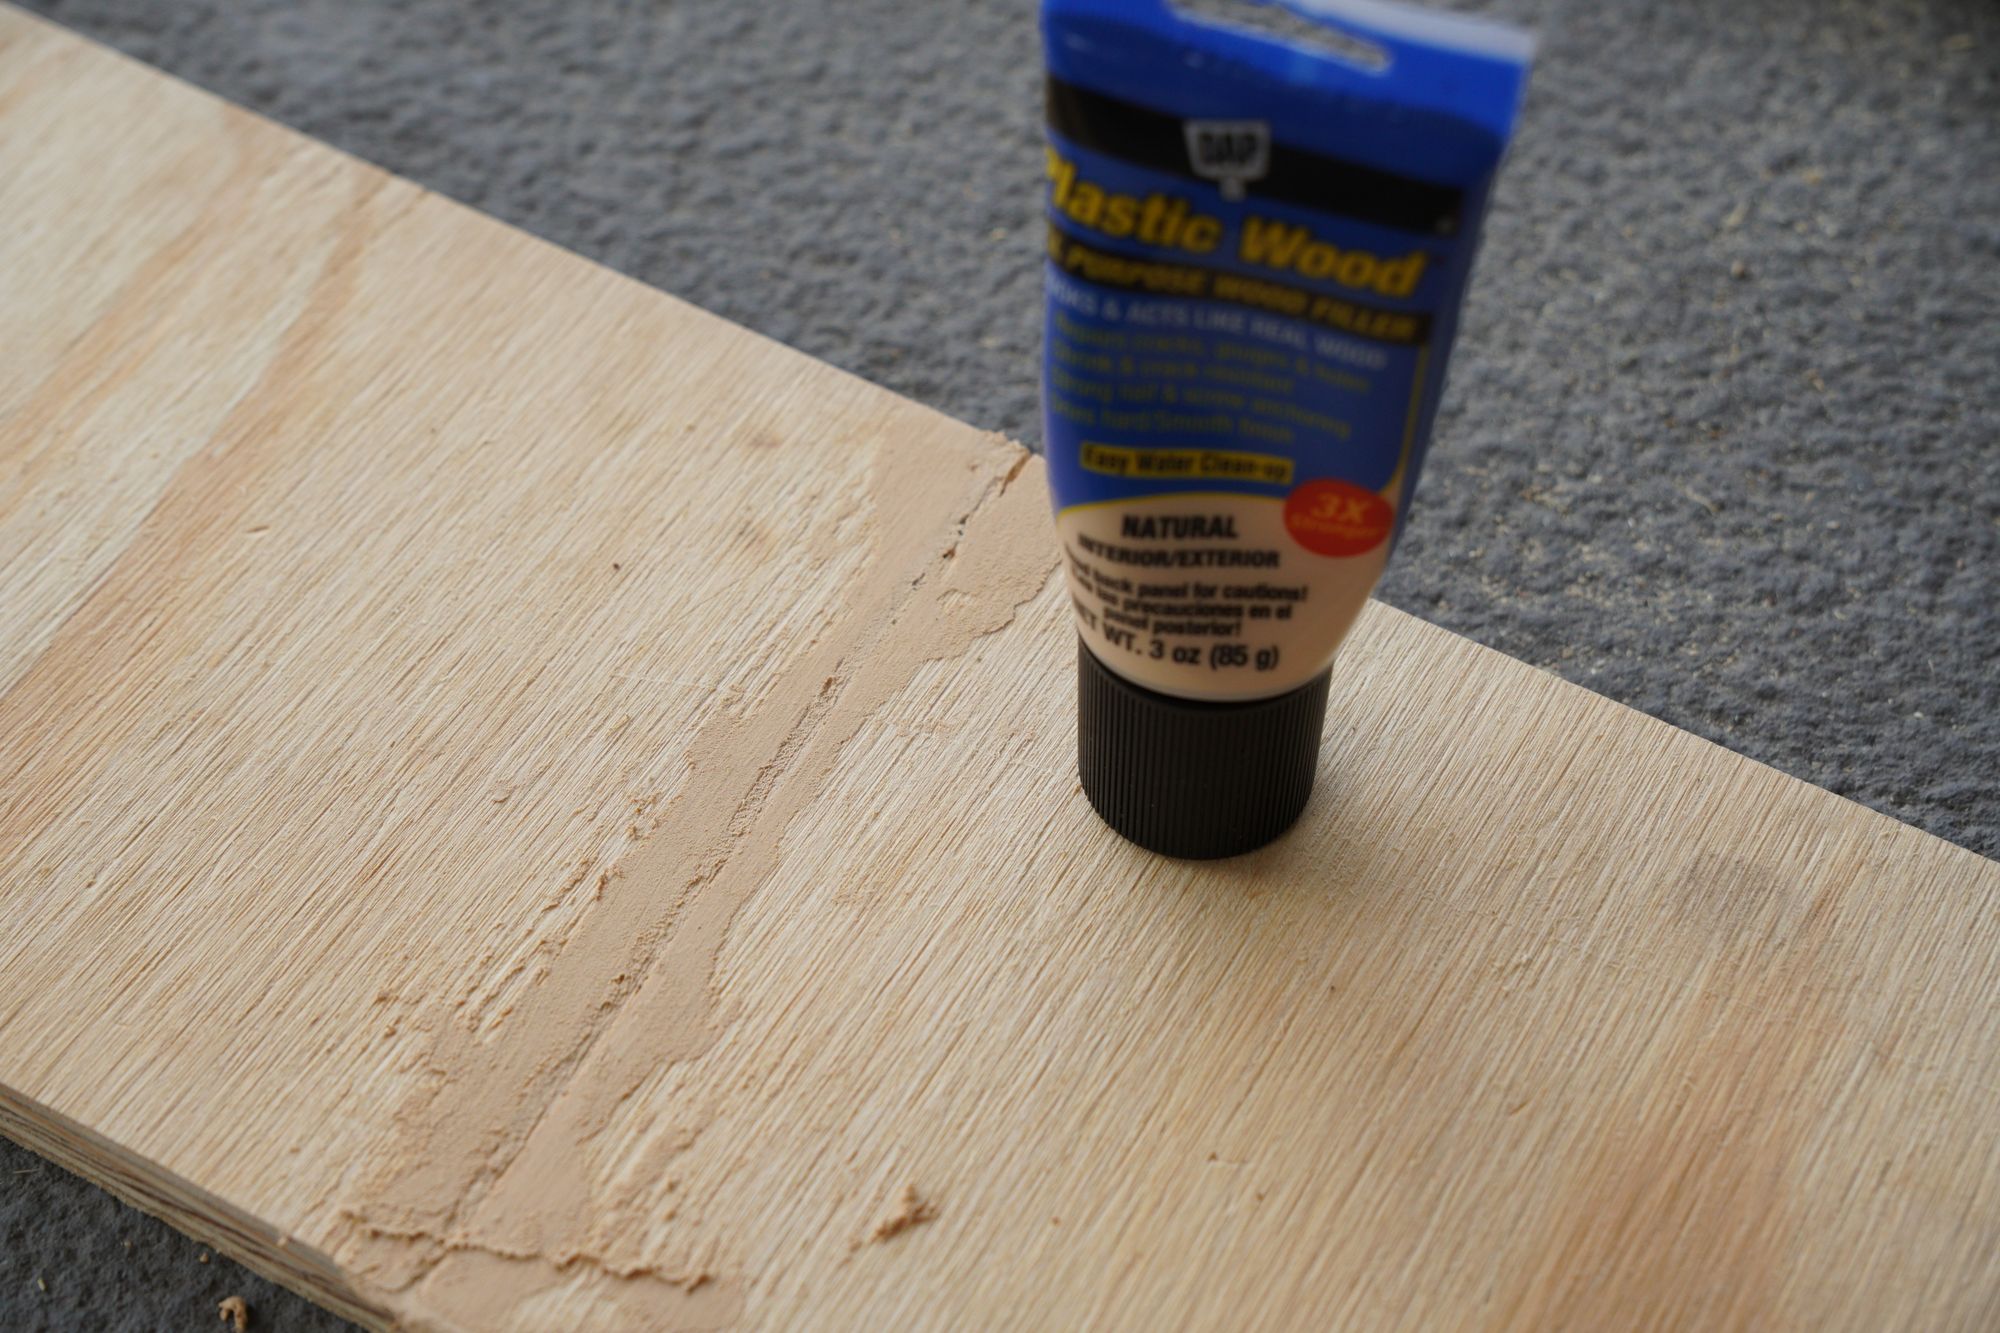
I already had bought wood filler to repair some parts of my car camping platform, so it was pretty easy to fill these in as well.
Once the pieces were cut out, it was time to move onto joining them together. I elected to go for pocket hole joinery. Using countersunk screws is definitely an option here, but there are two downsides.
1) You will see the screw heads on your drawer
2) You have to be very precise to avoid splitting your plywood
This is where I felt a little more unsure. Pocket holes and I have a little history... I tried to use them when building a pallet bar and my jig jumped all over, I screwed some plastic, and ultimately had to give up 😔.
This was my time to shine though! I told myself that the wood I had previously used was the problem and it was not my fault (honestly this has a decent amount of truth to it). I practiced on some scrap wood. It was going well! I could do this! I was flying! Until I came crashing down....
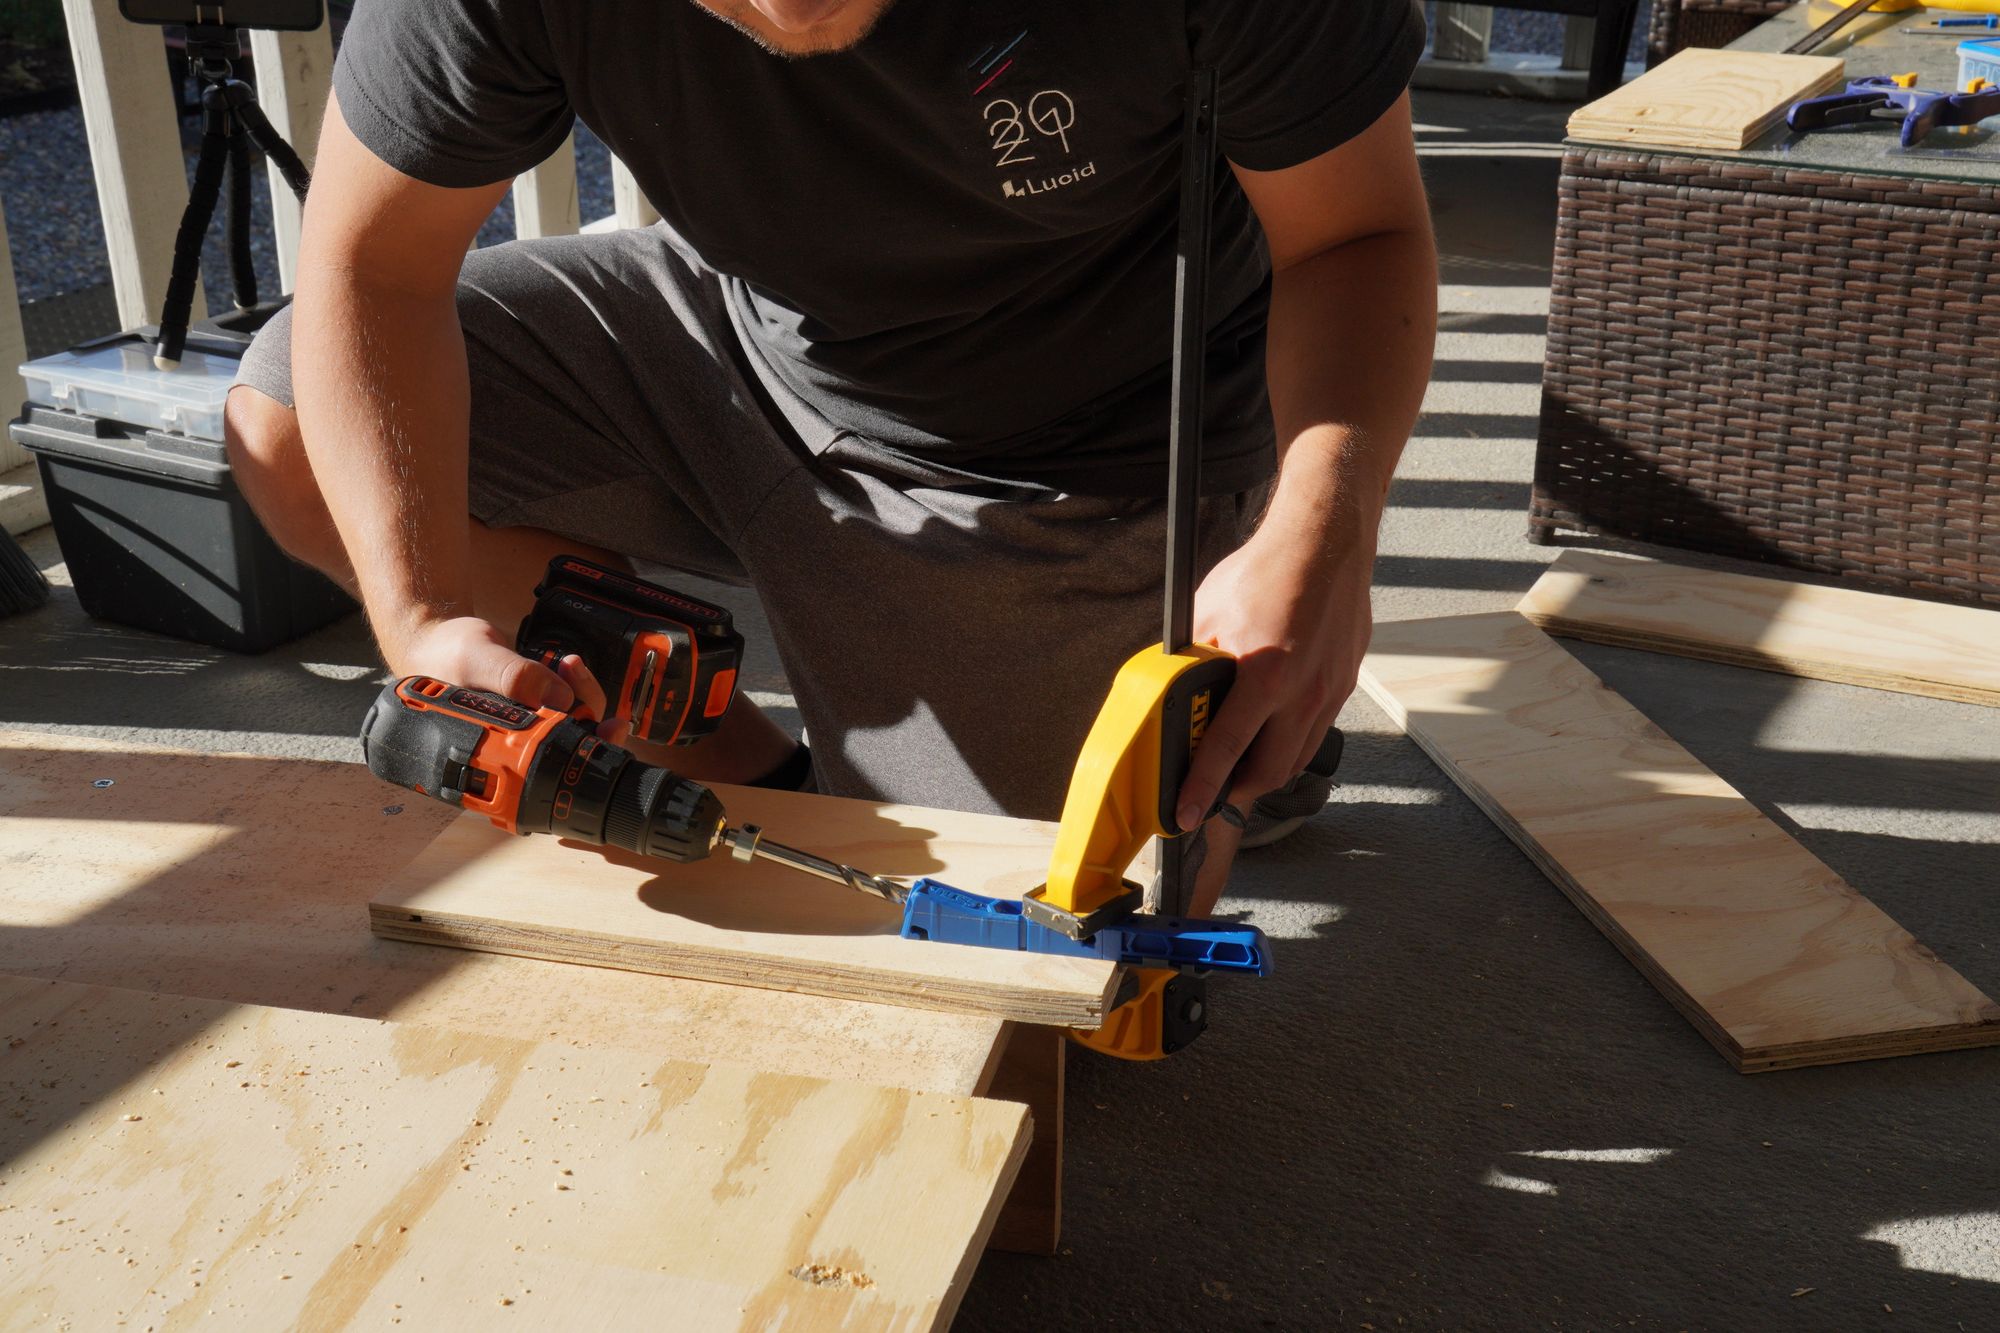
After drilling two of my pieces I looked closer at my drillbit. The little circle piece that sticks out on the bit you can see in the picture above is a stopper. That stopper is adjustable... That stopper was currently set at 1 1/2".... I would like to take the time to remind you that my plywood was 3/4"... 😭
In the end it wasn't a big deal, and I was glad I noticed my mistake early. I recut those two pieces, set the stopper to the right setting, and got back to work.
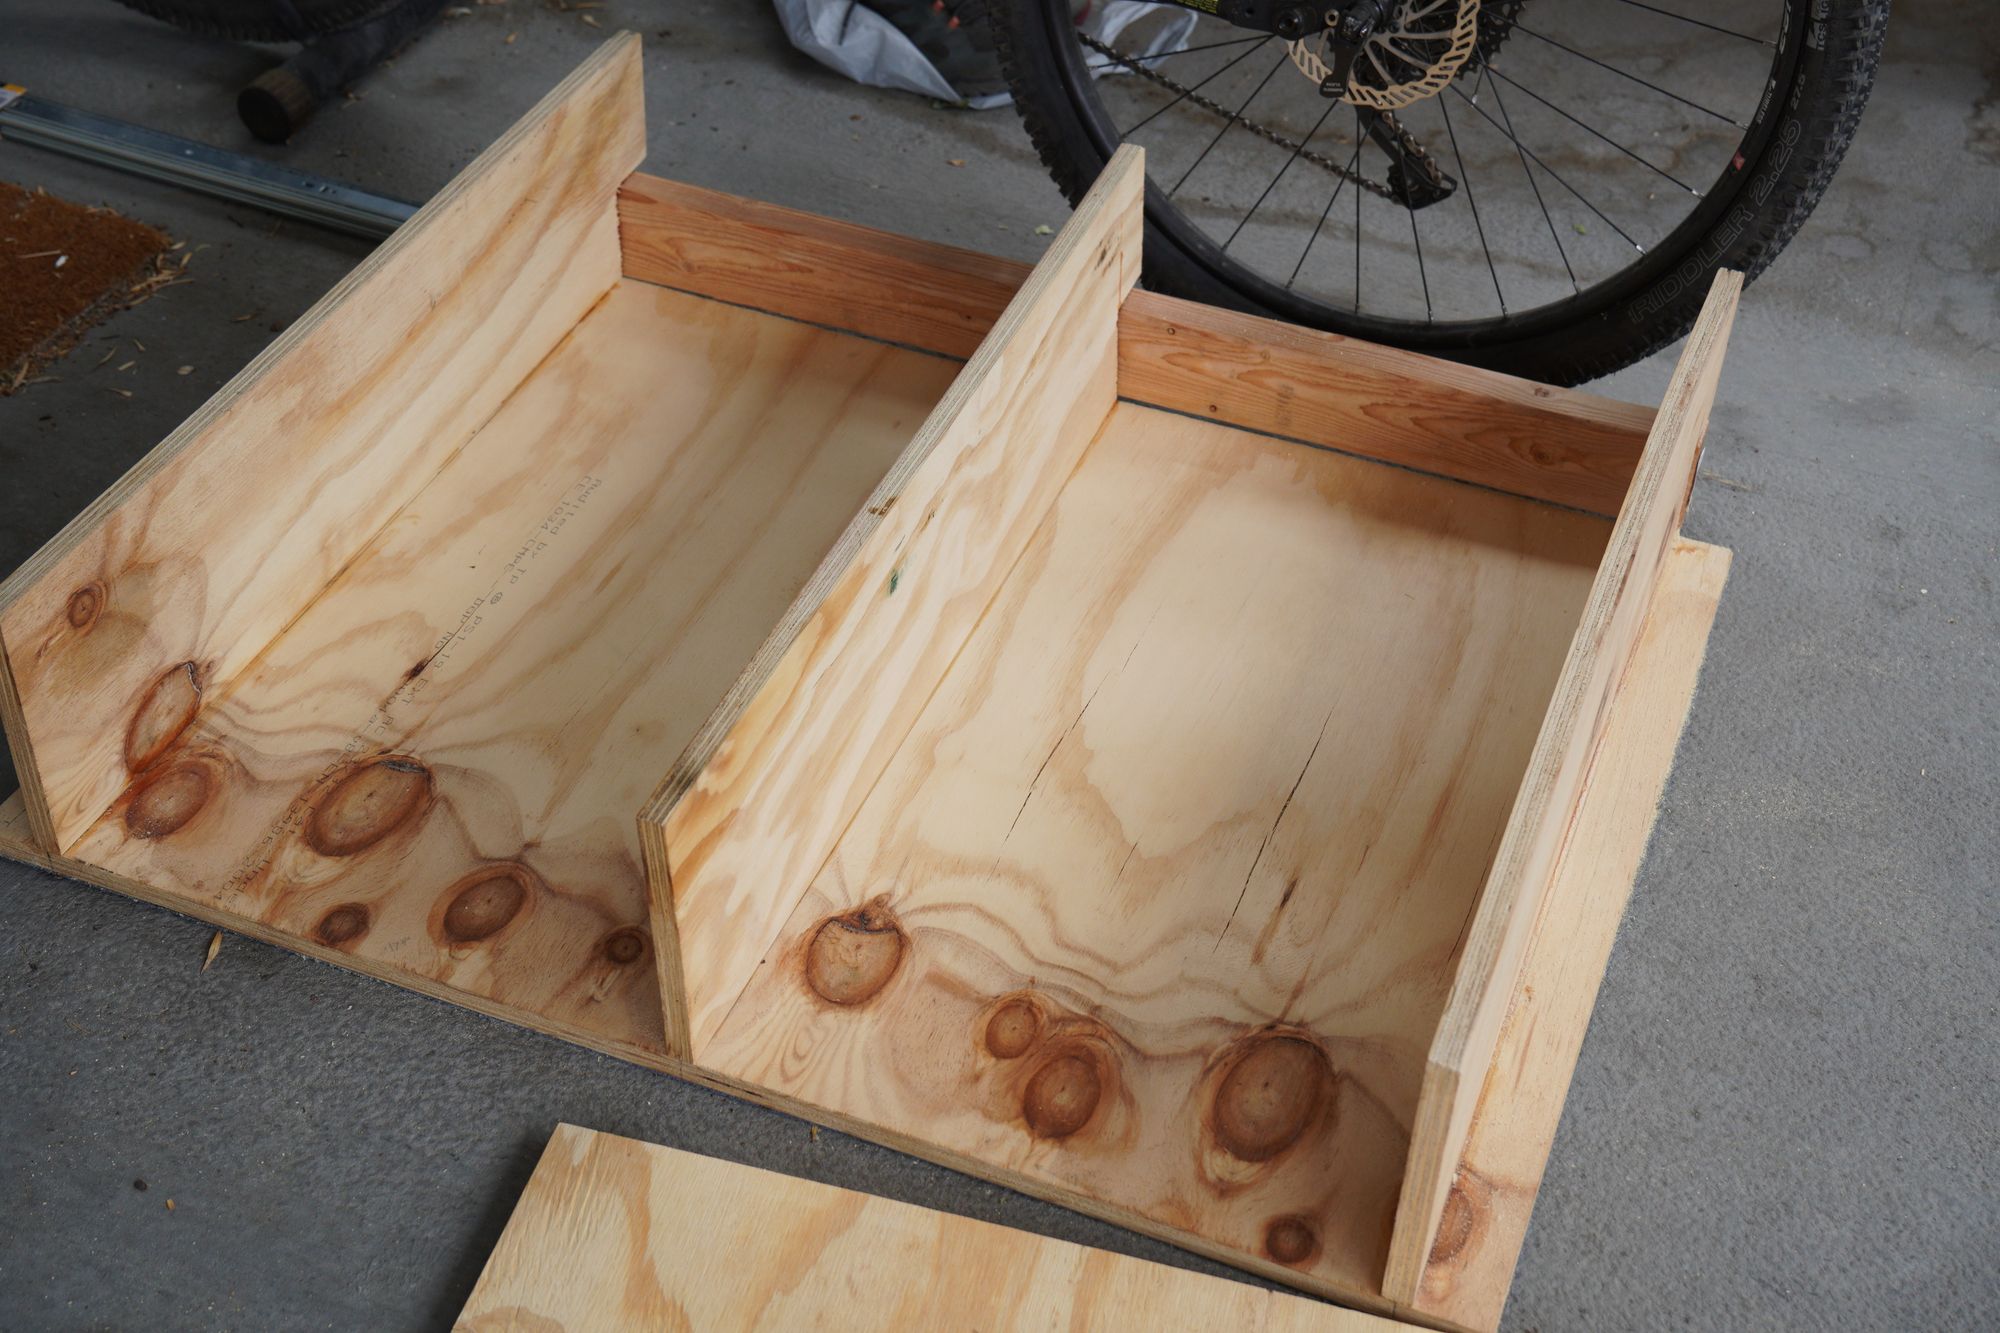
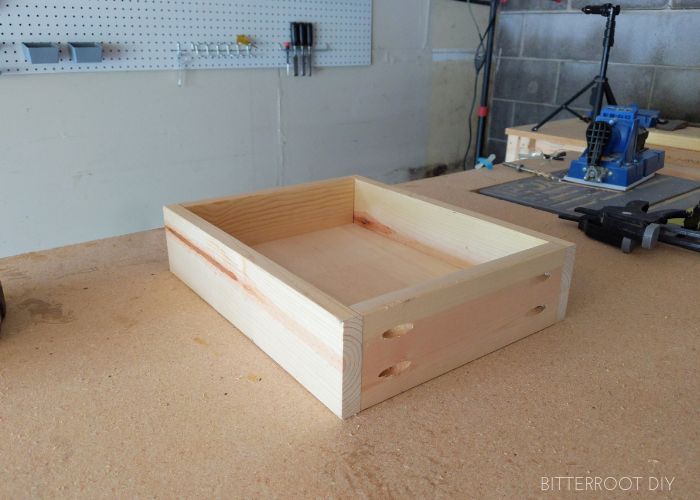
After finishing up with all my pocket holes, it was time for assembly. I used some scrap wood and a wall as braces to join my pieces with wood glue first. After letting that dry for about 20 minutes (roughly enough time for a beer 🍺), I drilled in the pocket screws. Do that with one side, rinse and repeat on another side until the whole thing was together.
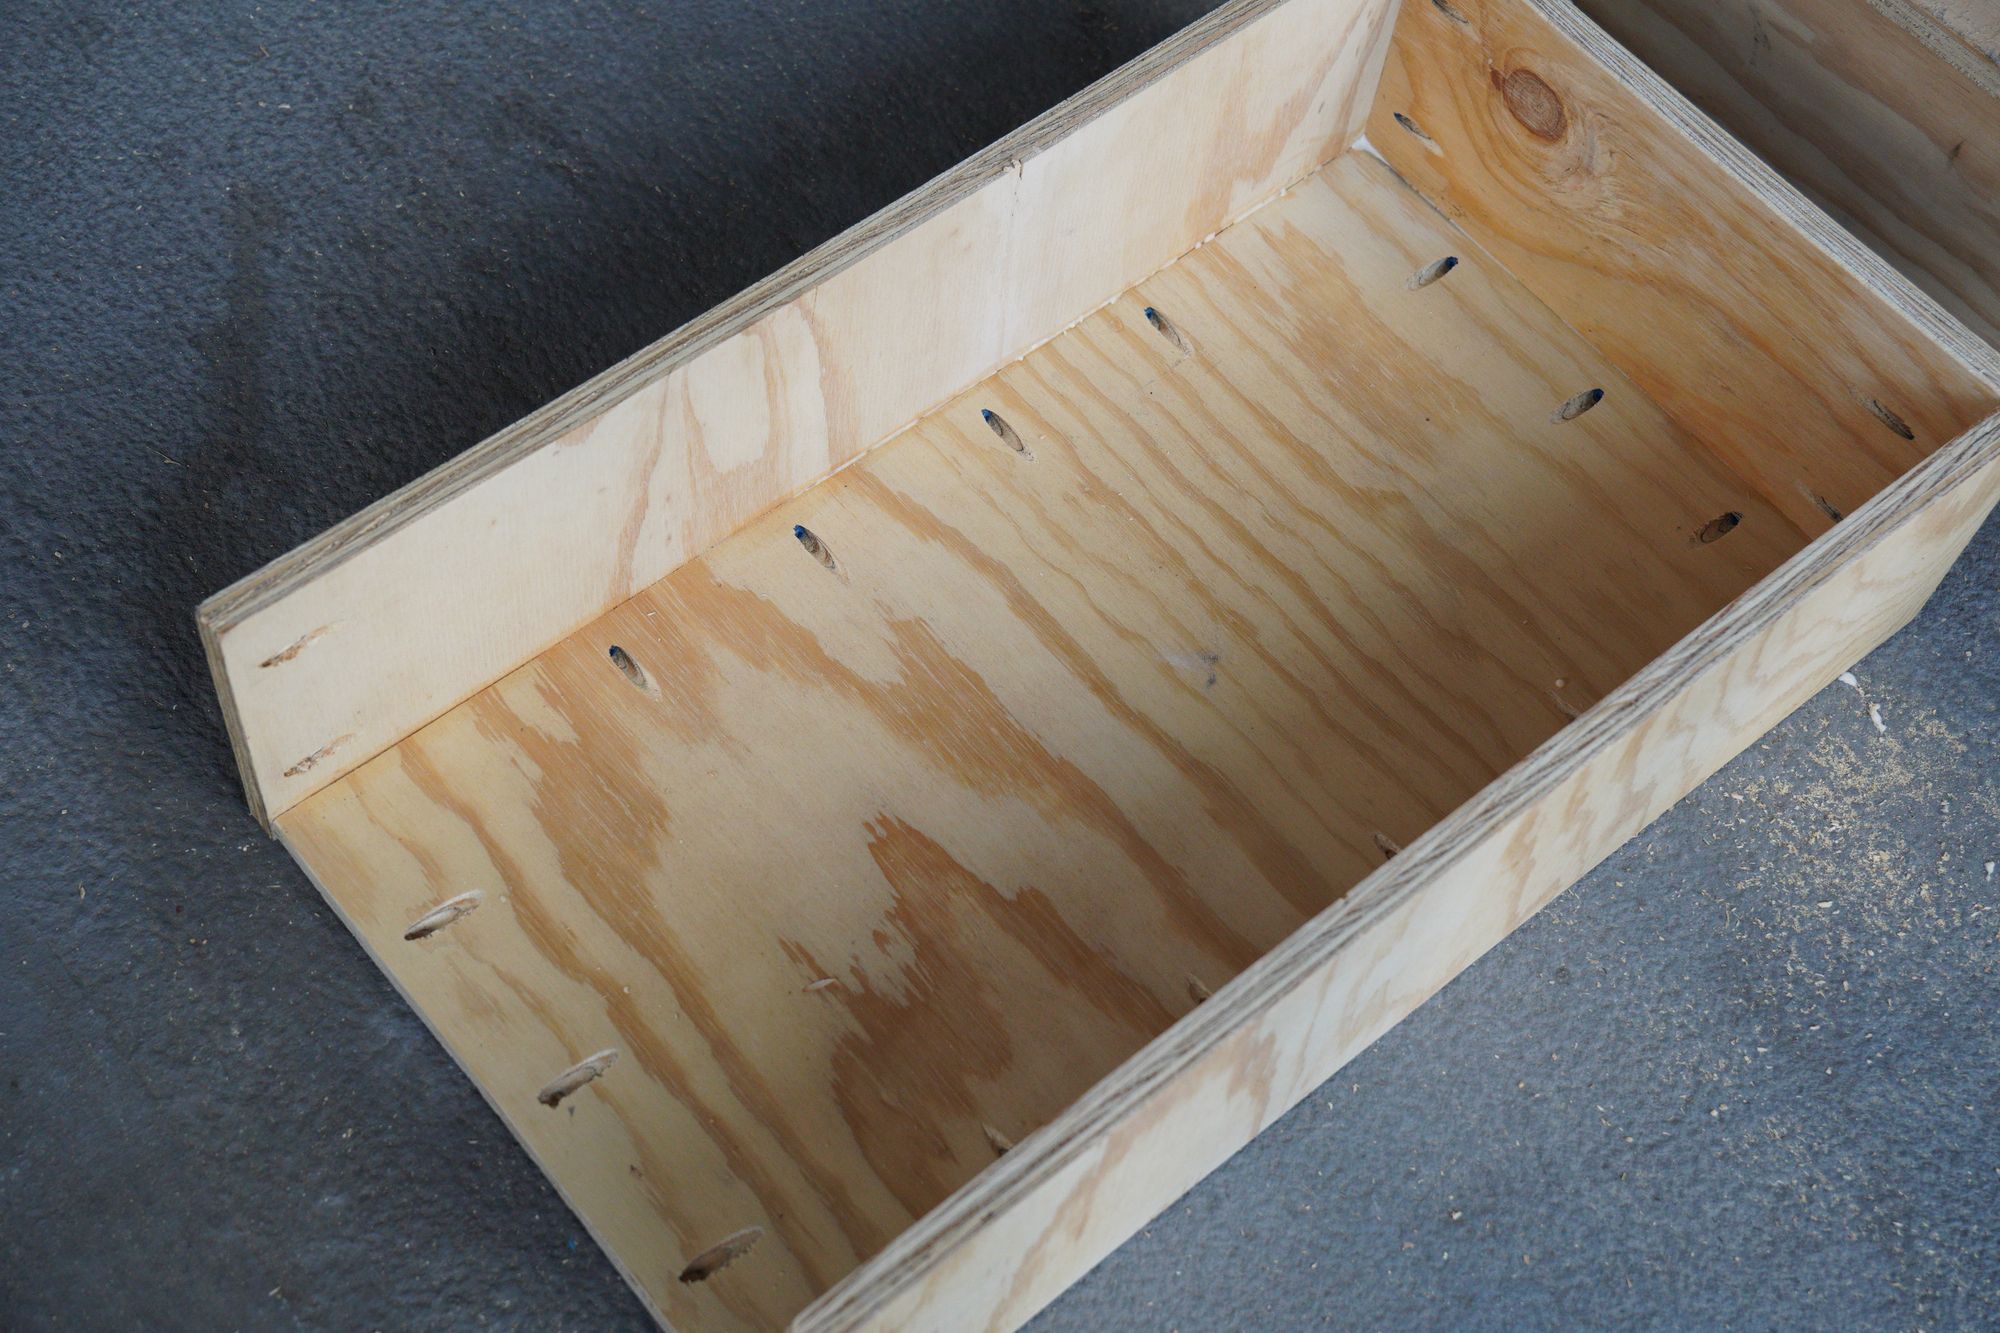
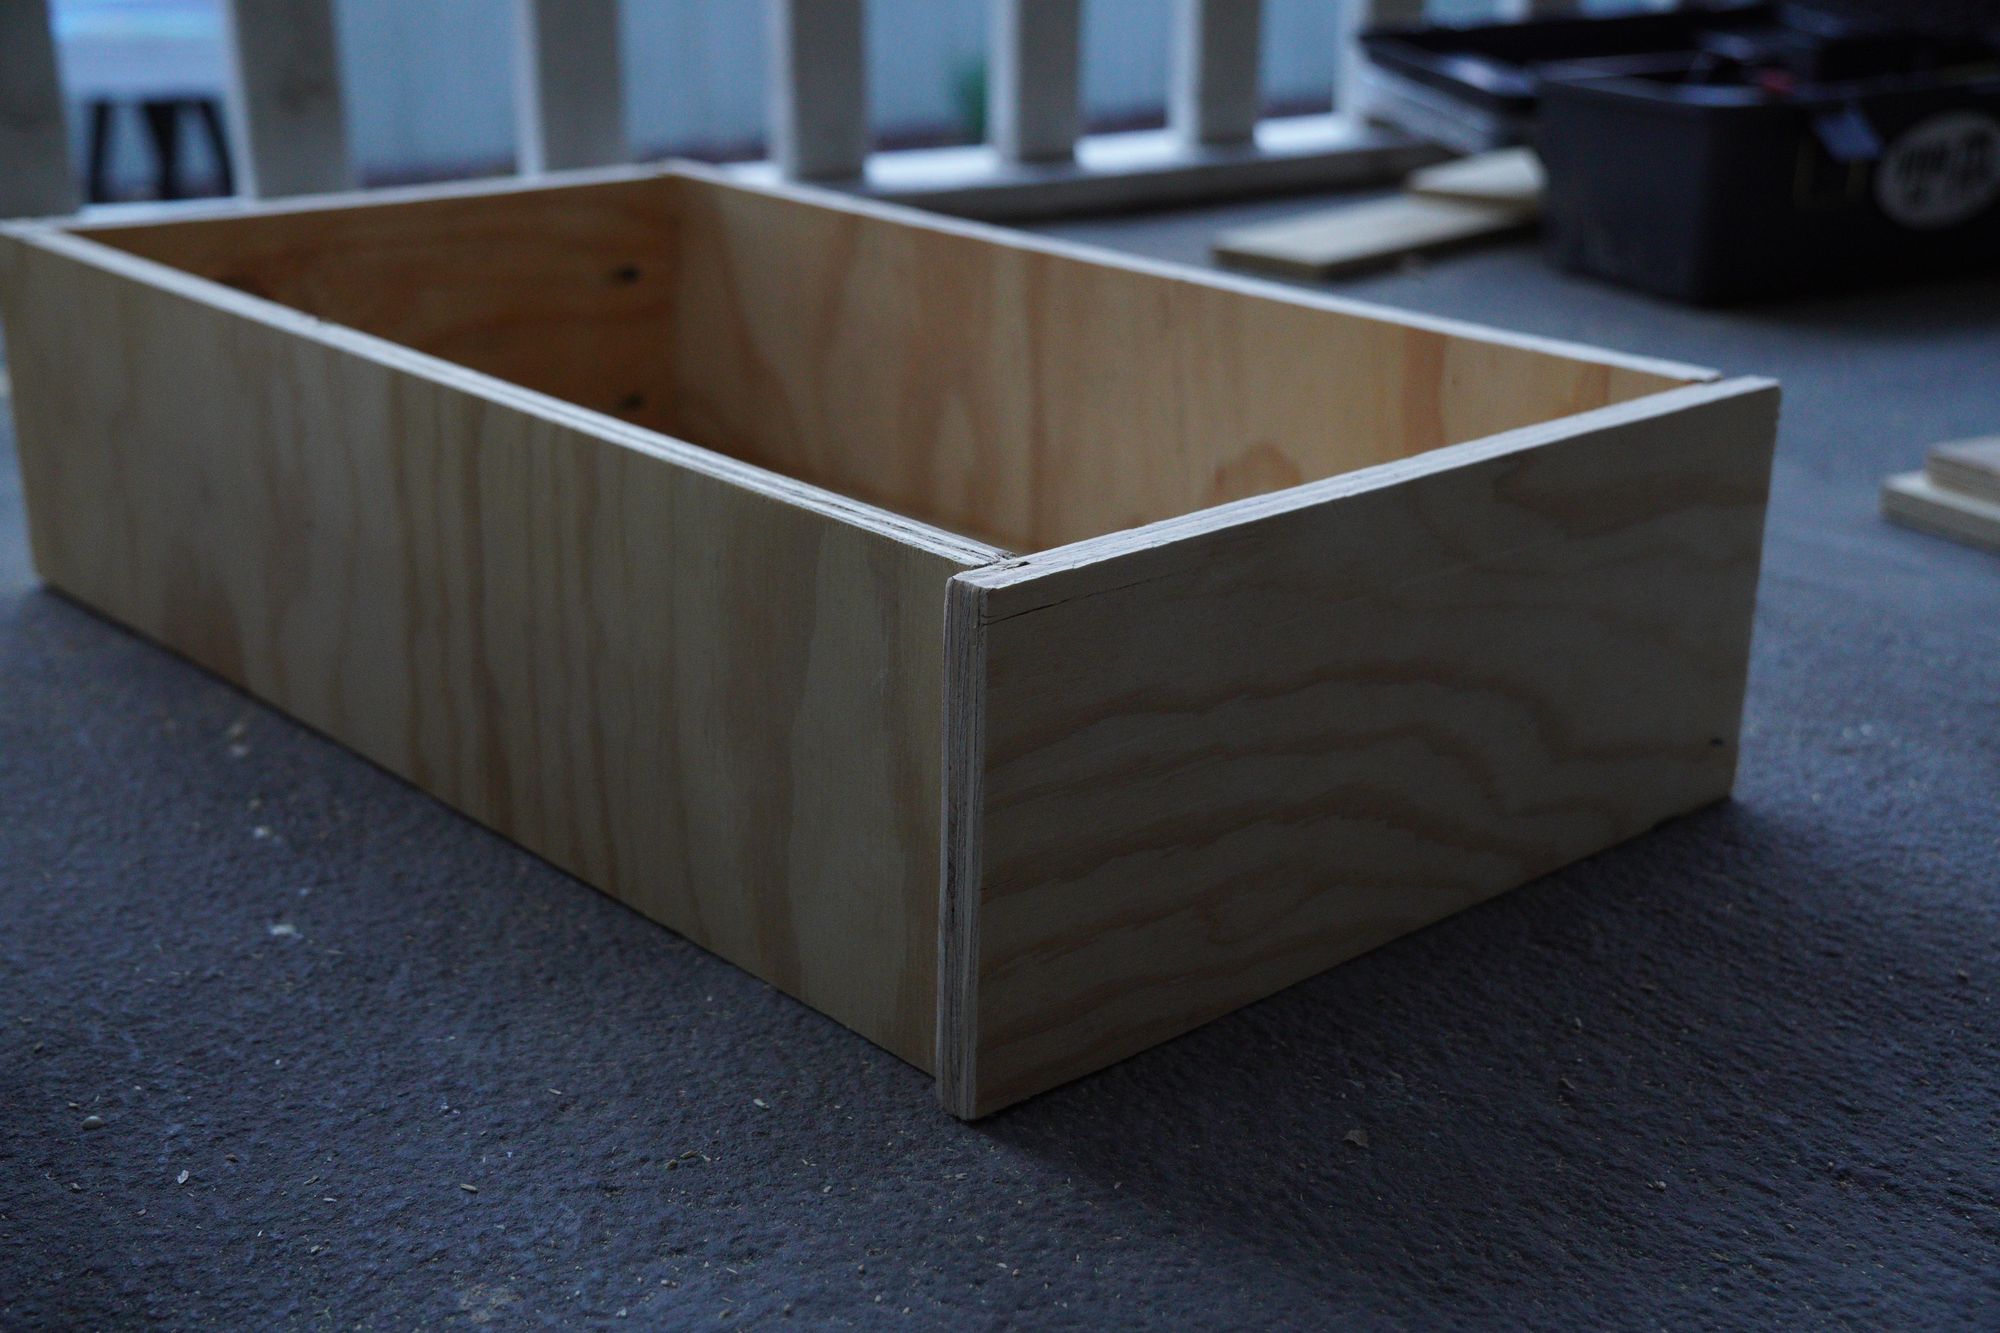
Partway through the join, and then the finished product!
I then took some time to apply the stain/protection, and did some fist pumps to myself while that dried. I was feeling really good at this point! I FaceTimed my mom to show her the progress and she celebrated with me before kindly mentioning that next time I can hide the pocket holes by drilling them on parts of the drawer you wouldn't see. Oh well 🤷🏽♂️
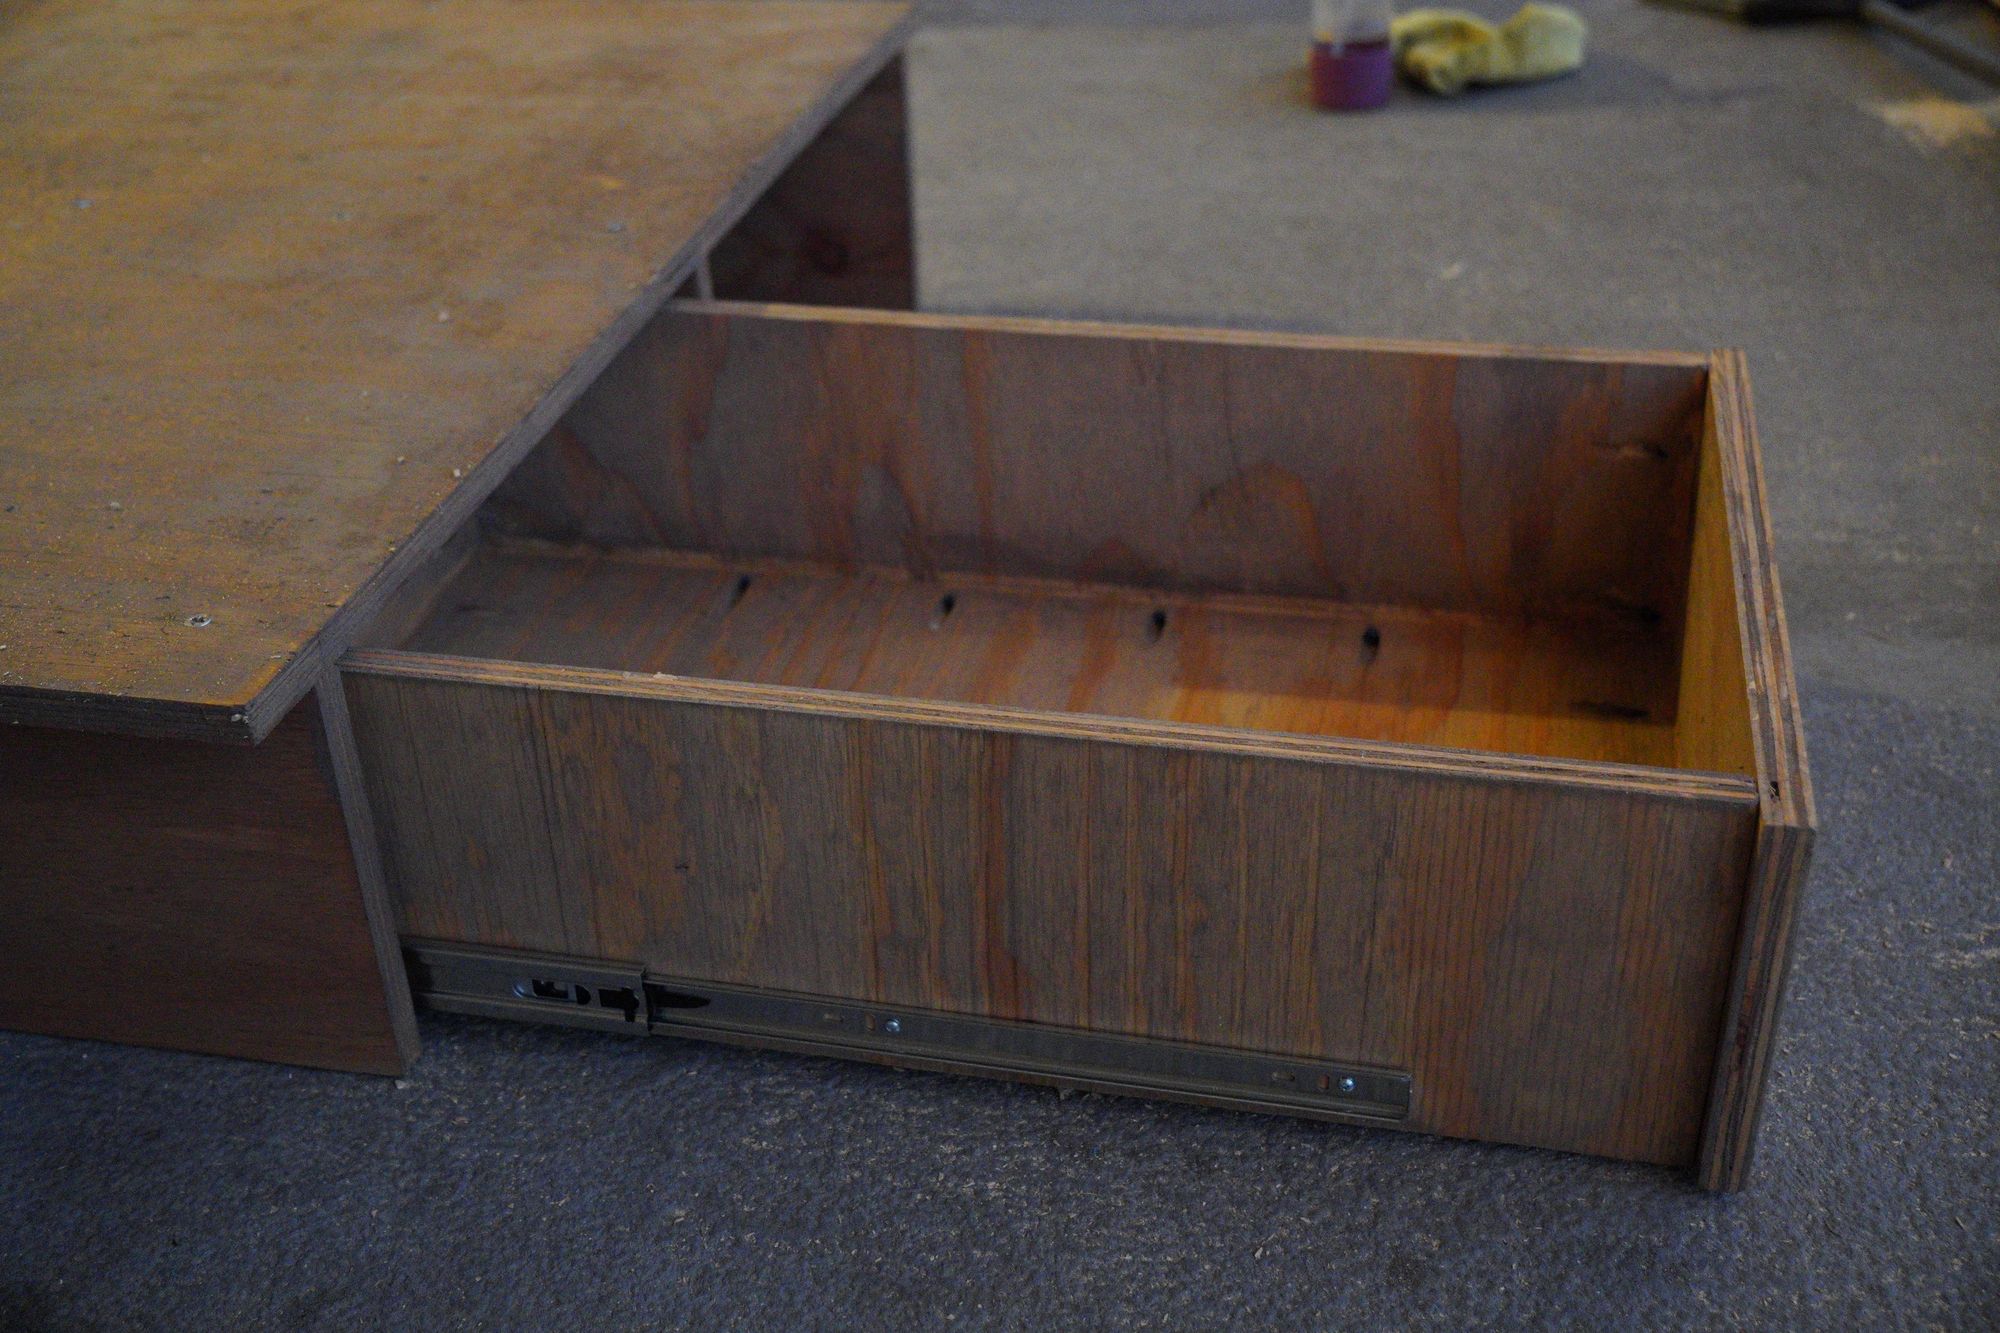
Next up was by far the most challenging part of the whole process – installing the drawer slides. I don't know who they hire to make drawer slide instructional manuals, but I could of used a little more assistance 🙃. (This was probably a me issue)
I was really worried about this installation because I wanted the drawer to slide correctly and for it to be level. I disassembled the slide, installed part of it onto the drawer. That was fairly straightforward. The challenge was trying to figure out where to install the other portion of the slide on the actual platform. I was trying to hold up my heavy drawer with one hand while measuring/marking with my other hand which was not working. In the end I marked the same distance from the top of the platform on each wall the drawer would attach to. Then I screwed the other slide pieces in while periodically checking if they were level.
I sent up a prayer, and slid the drawer into place. Against all odds, it slid in smoothly!!! My initial excitement faded though as I heard a knocking noise. The front of the drawer was hitting against the platform as it closed. I noticed the whole drawer was slightly cockeyed.
Thankfully, this was a quick and easy fix. I just had to move one of the drawer slides up slightly on the platform and reattach the drawer. Once things leveled out it was still hitting slightly, but way less than before. To resolve the remaining friction, I sanded down the side of the front piece of the drawer so it slid in smoothly!
Installation
The last step was to lug the now very heavy piece to my car and set it up!
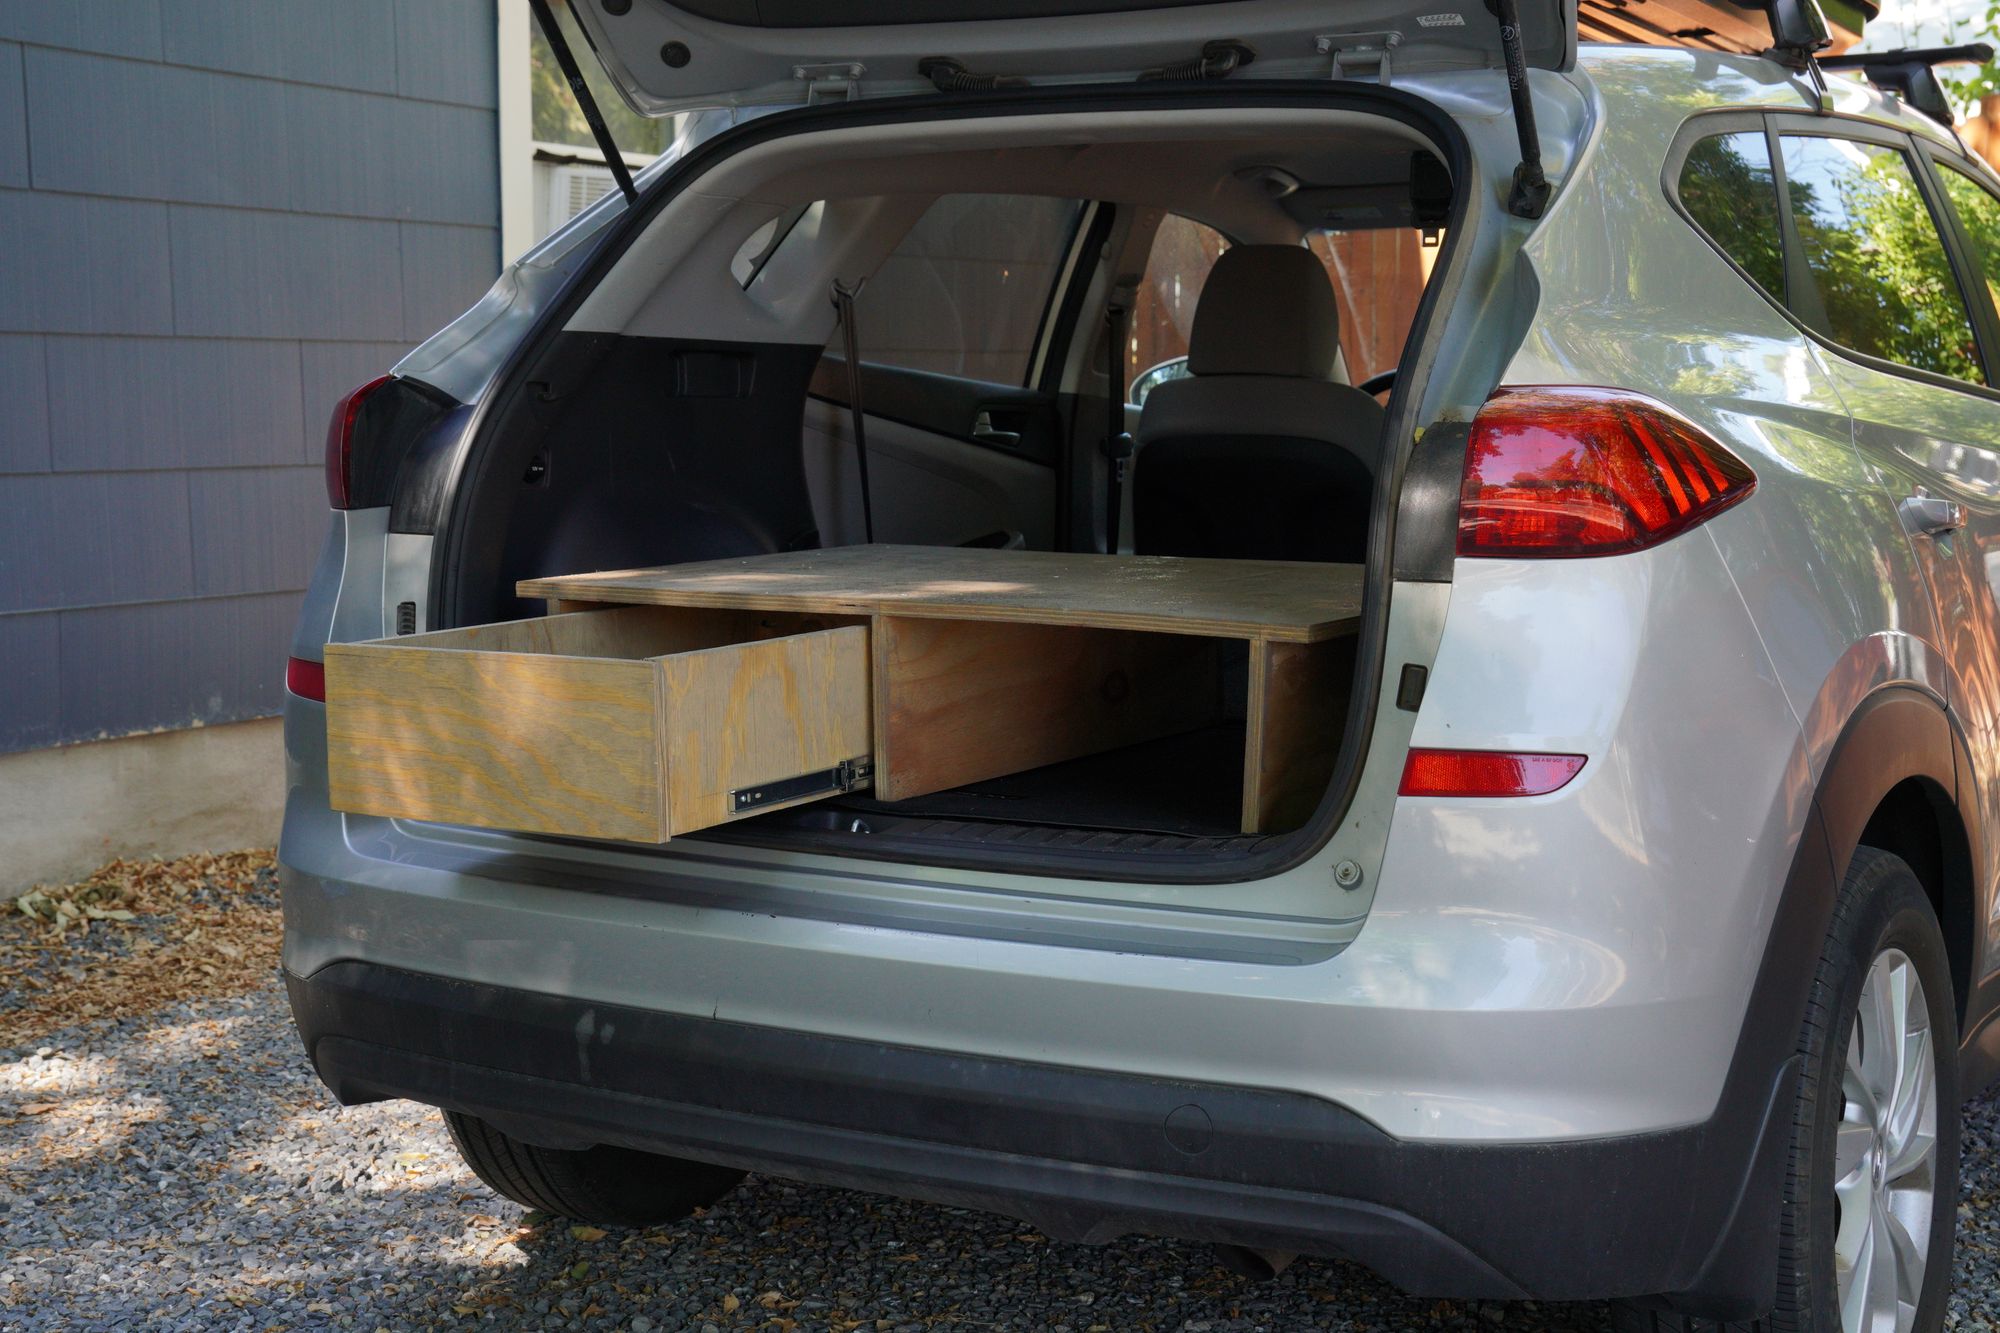
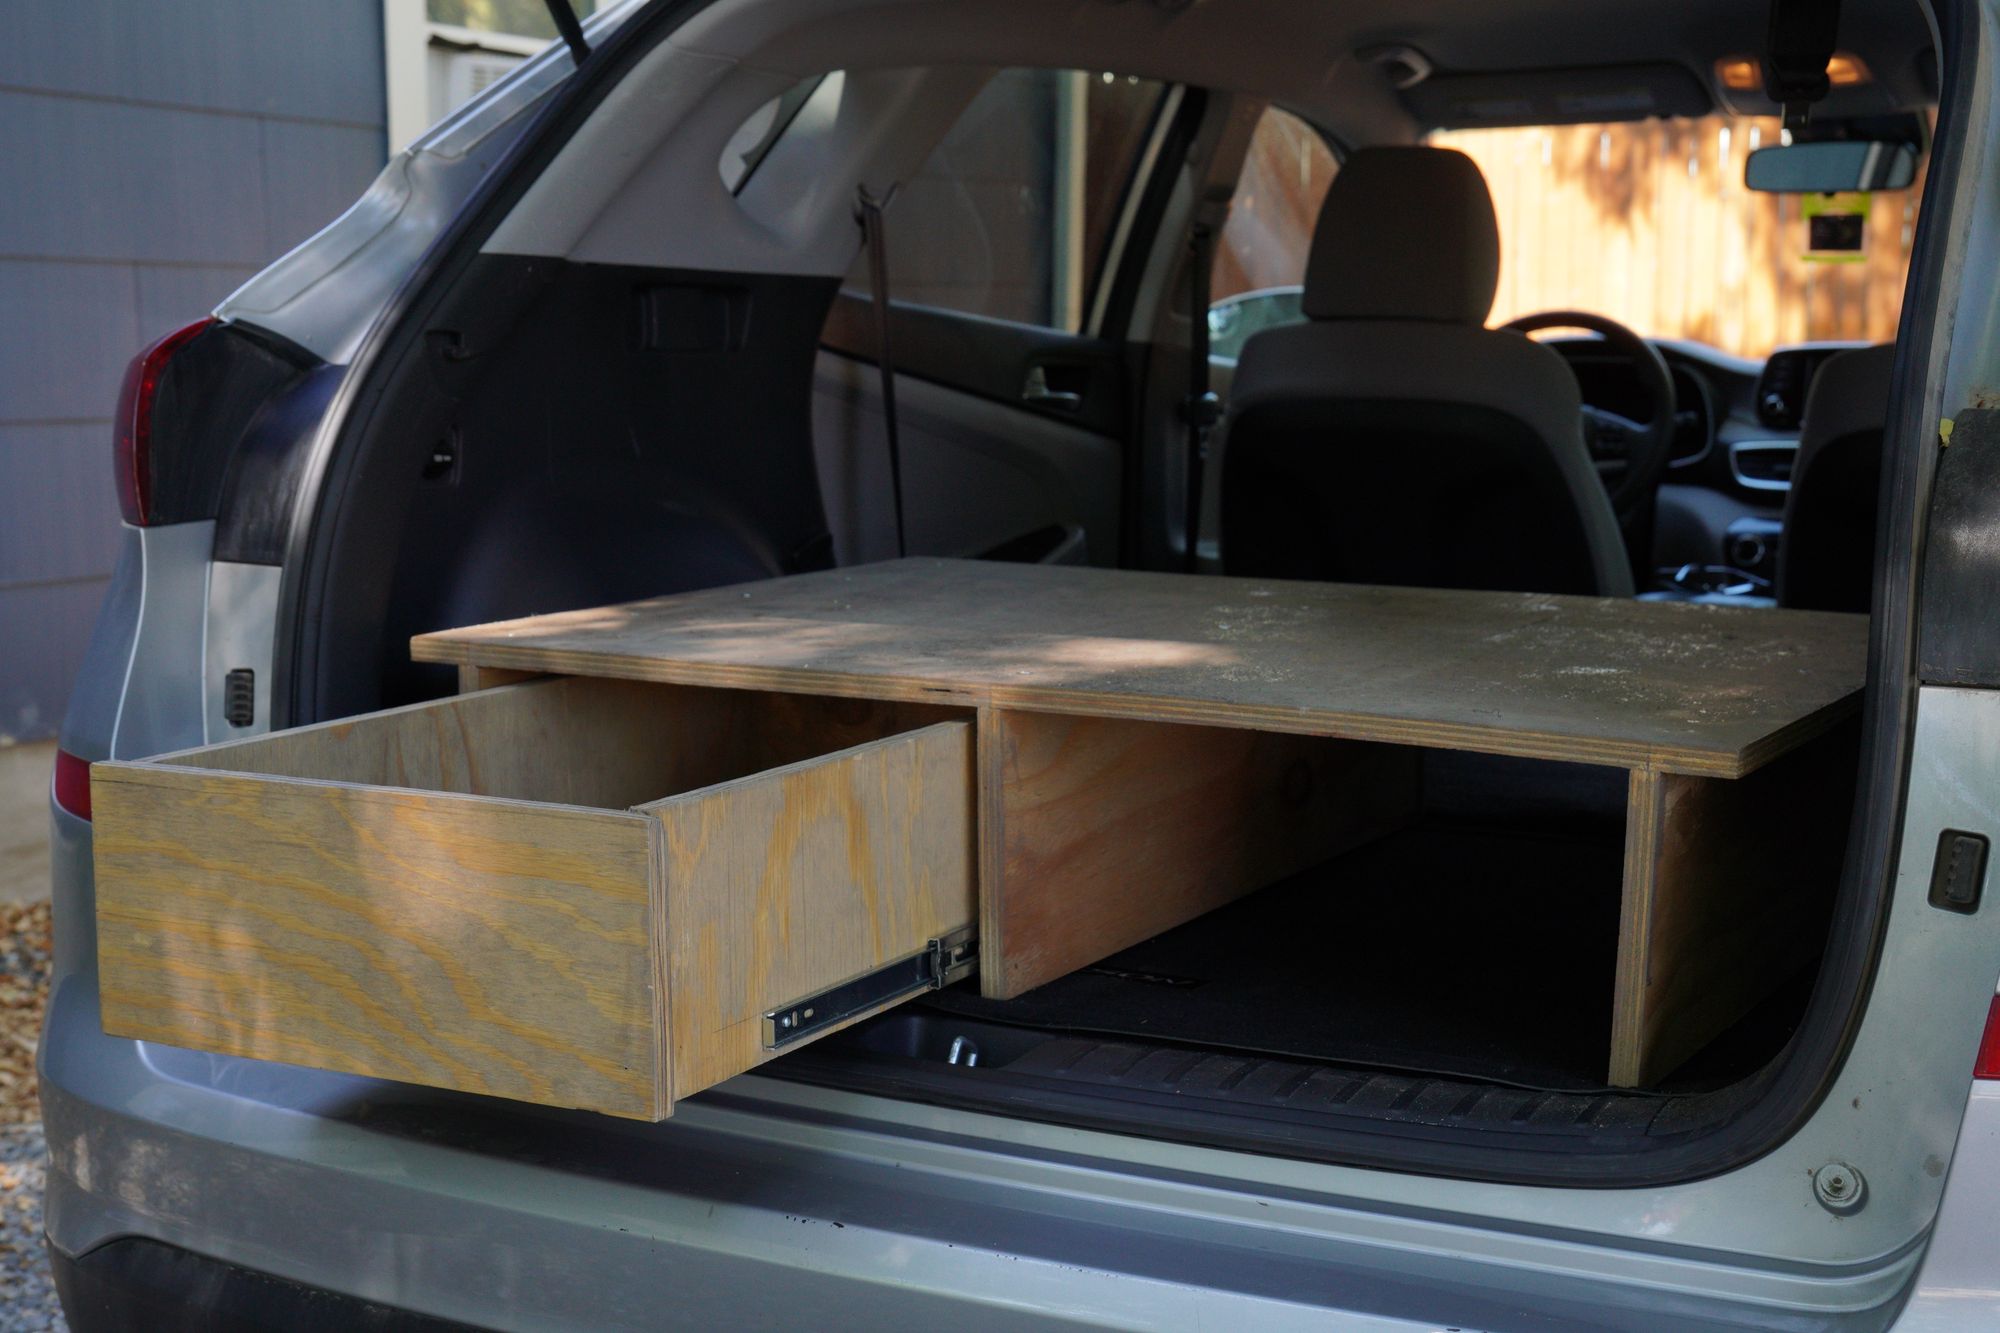
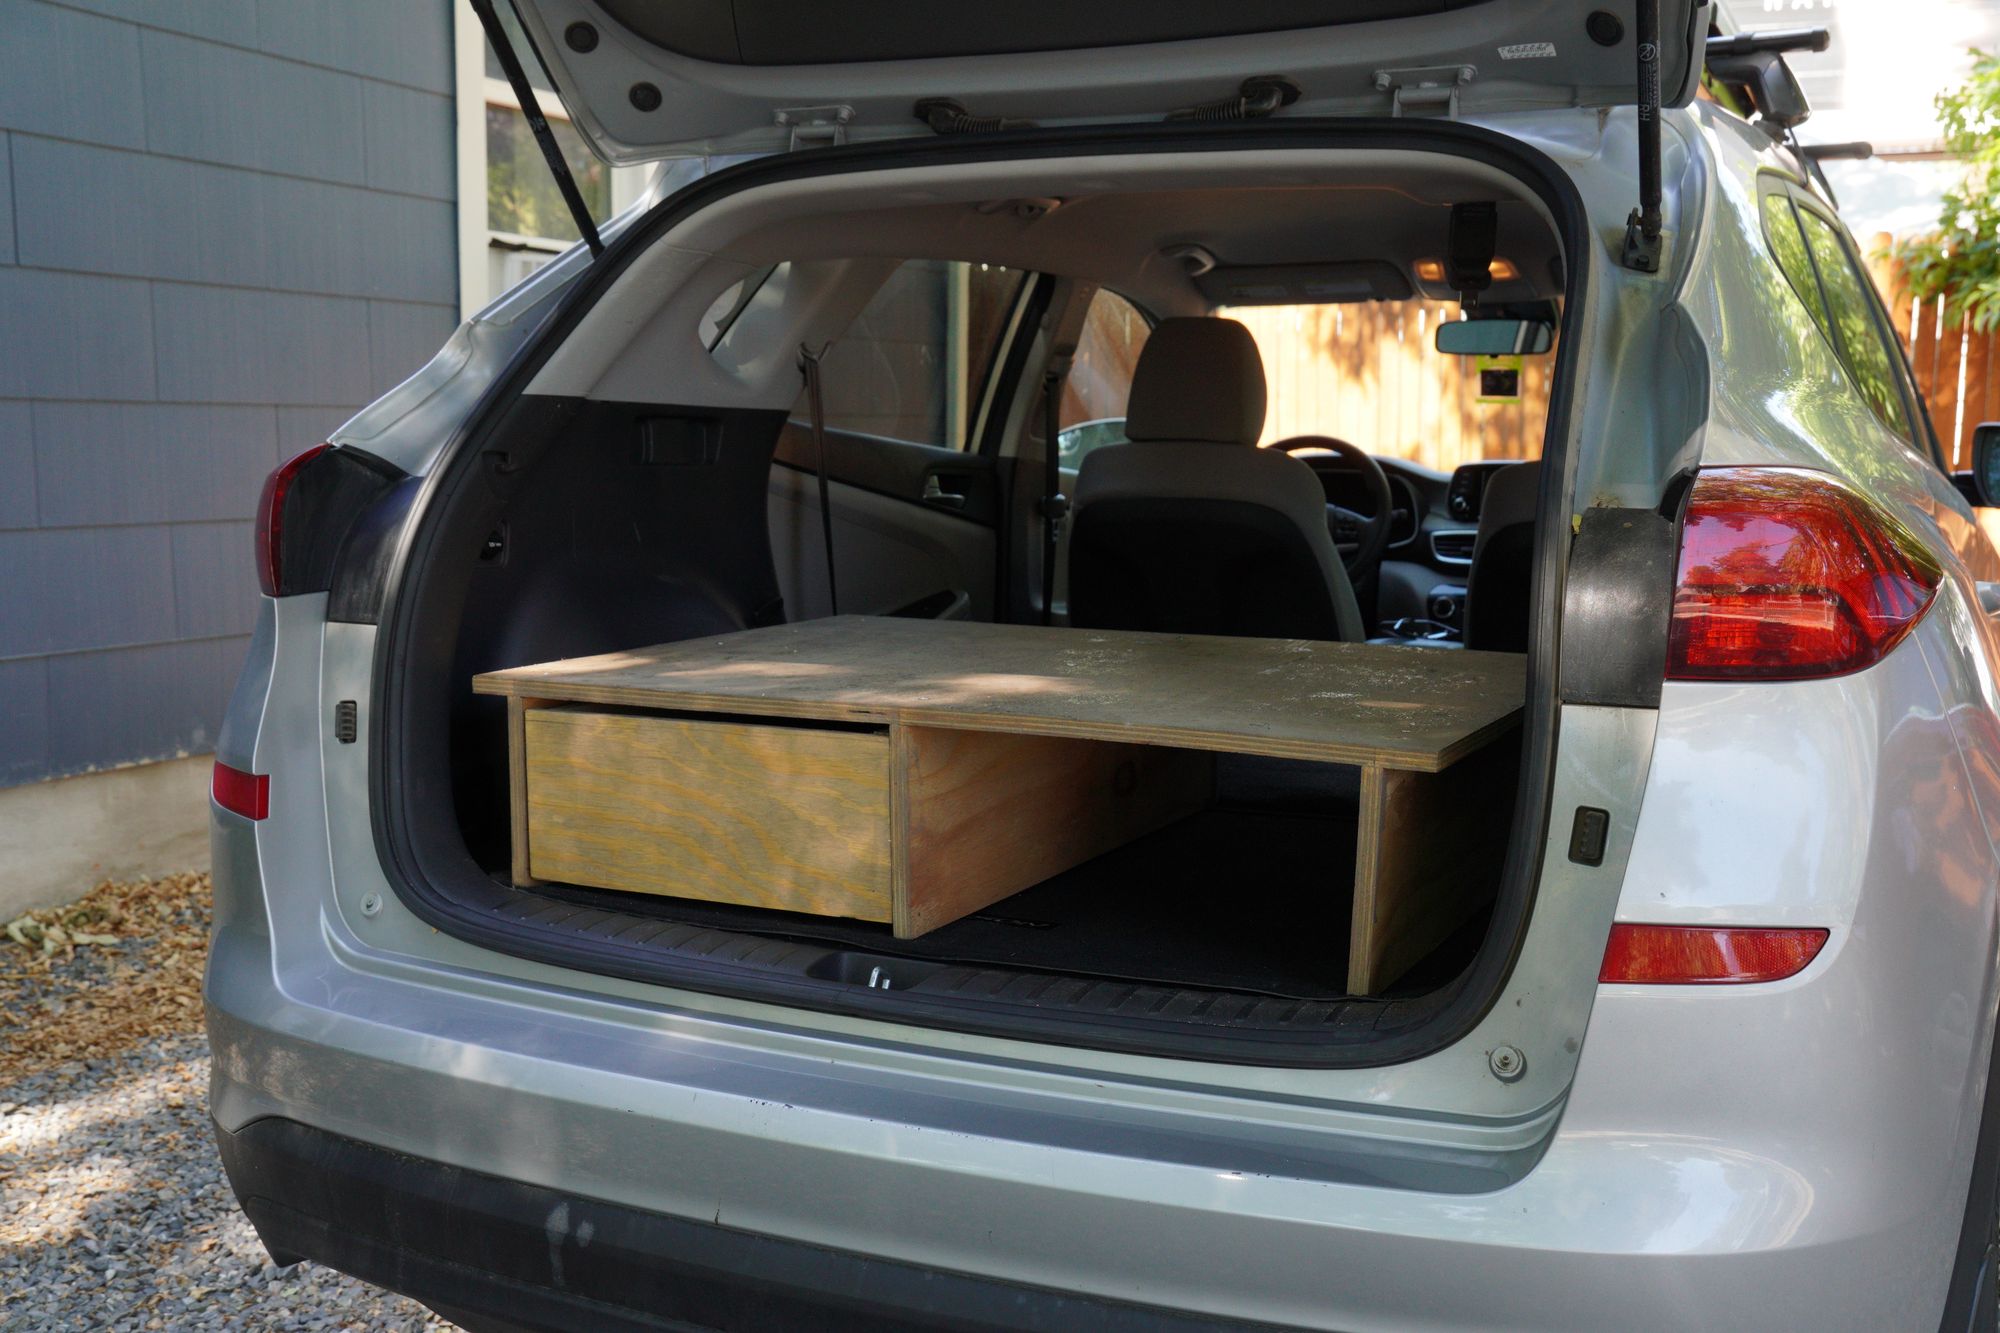
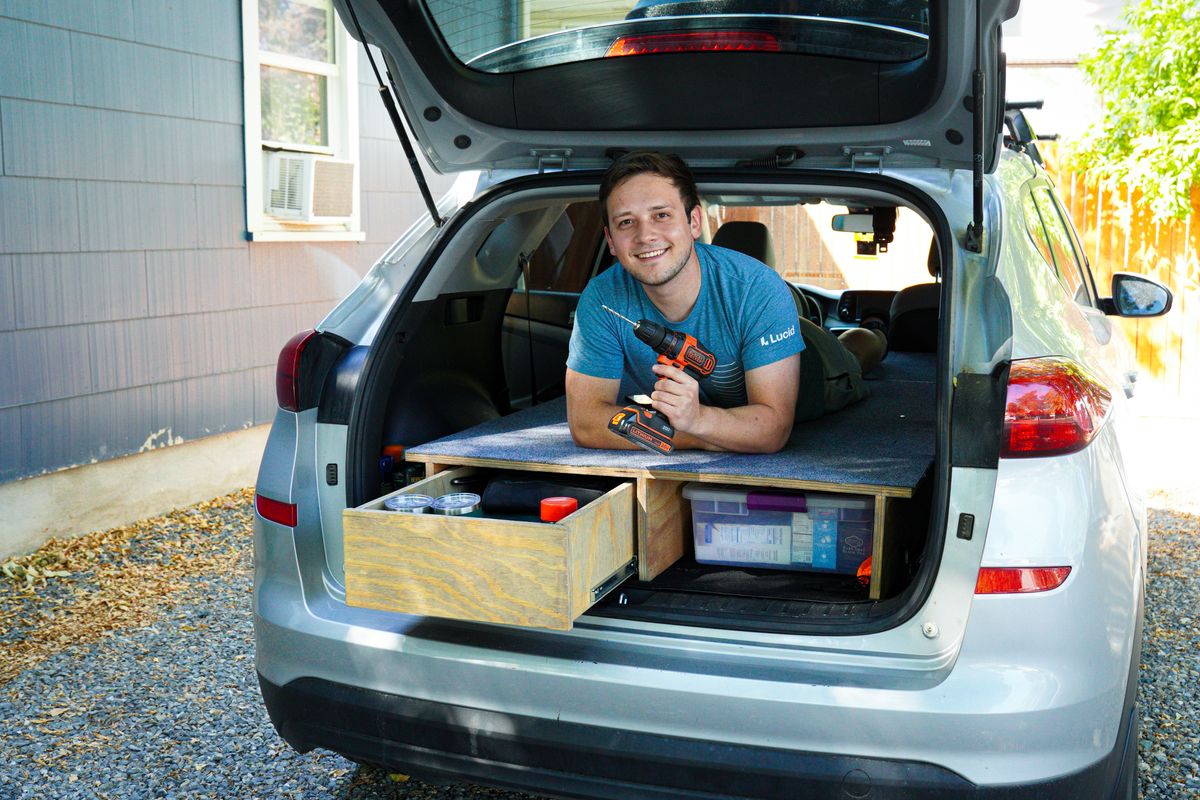
Whoop Whoop!!! Everything was looking good
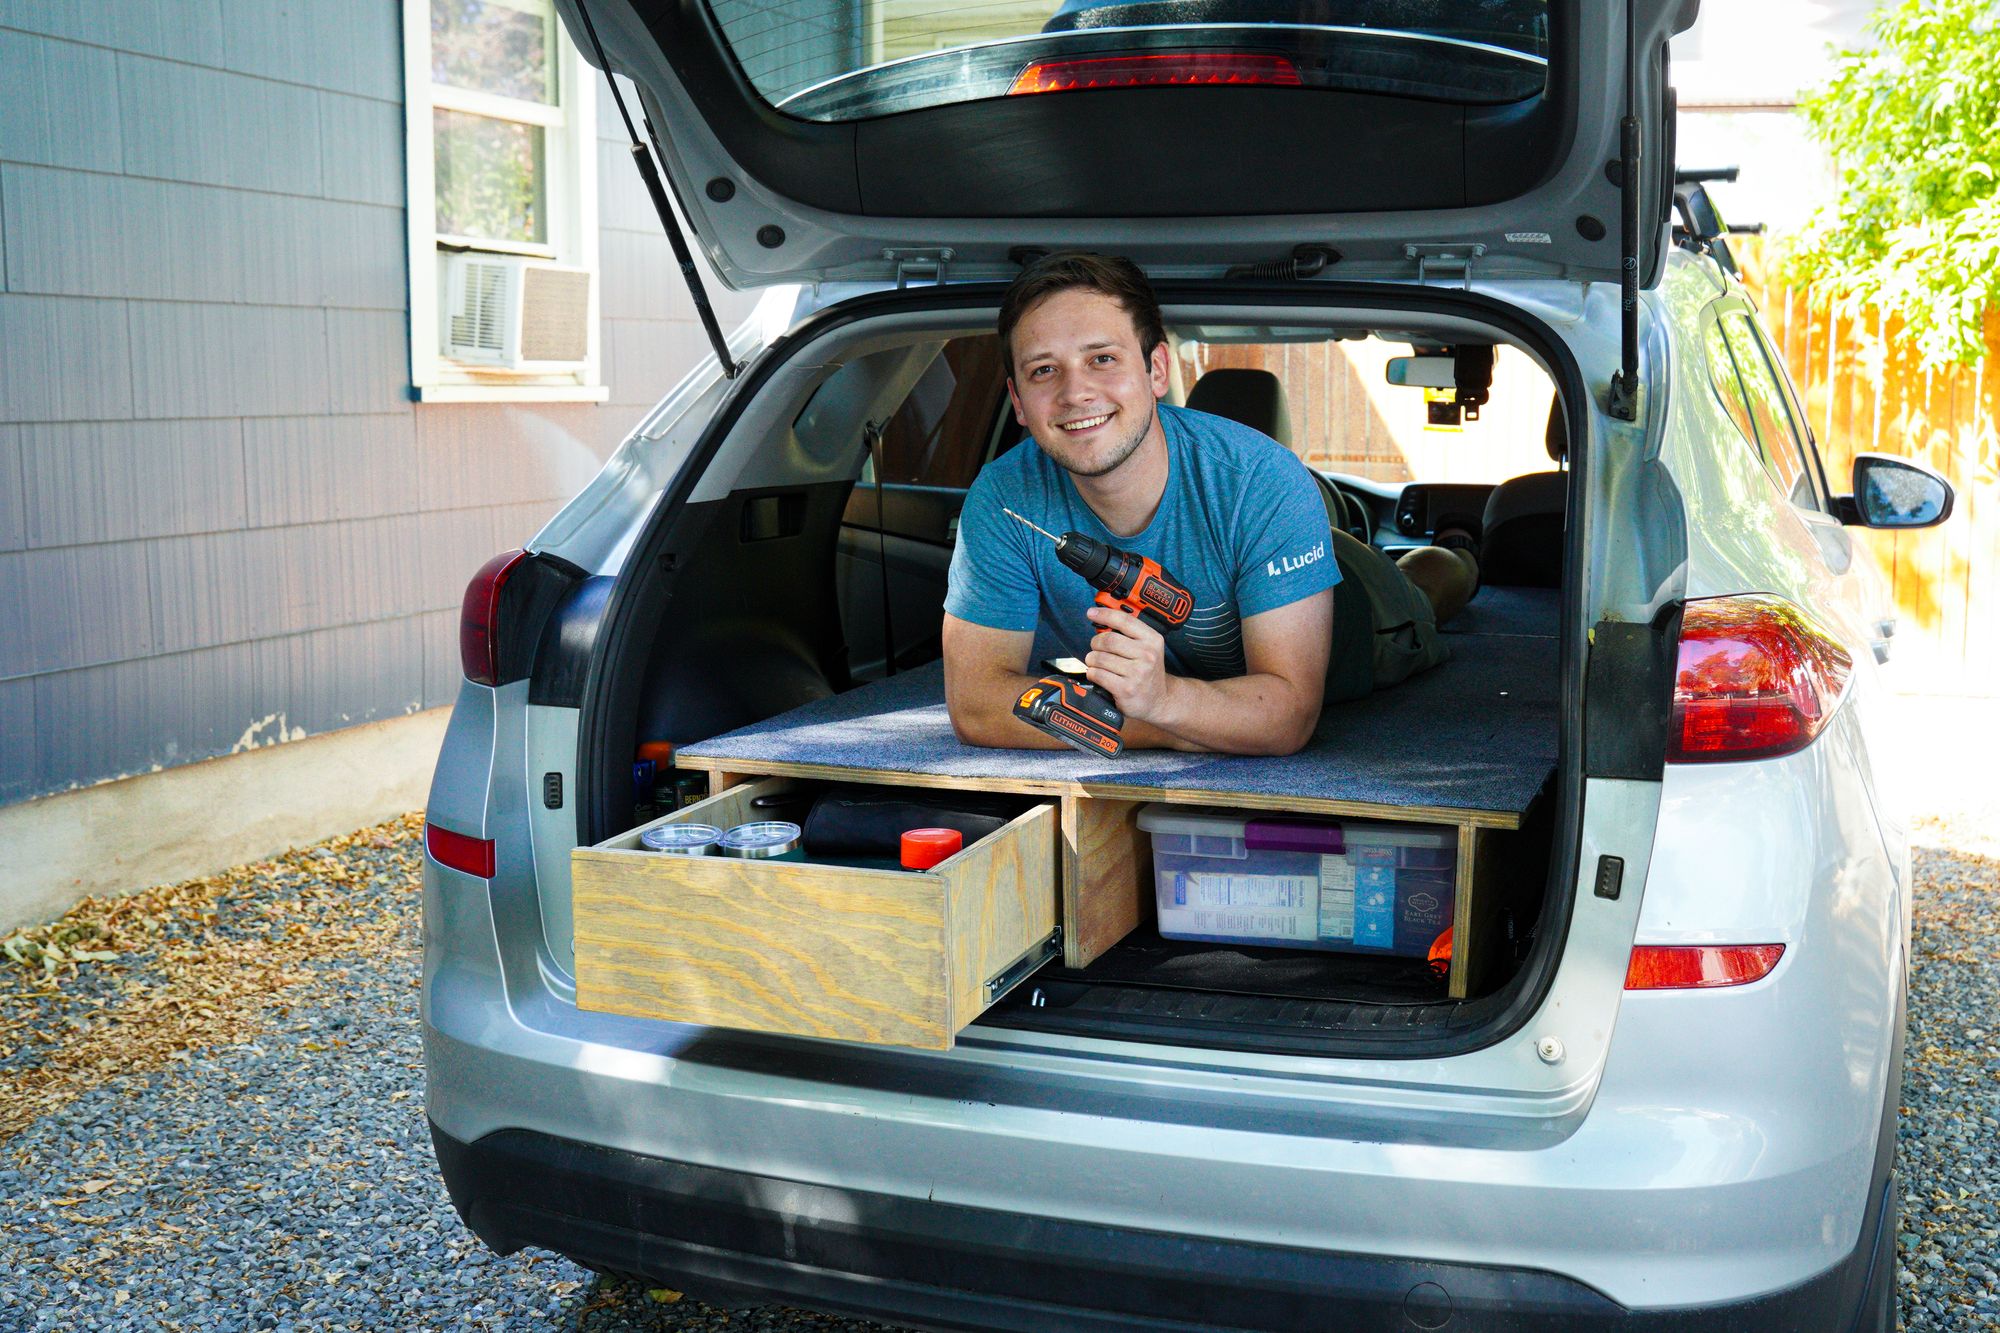
I was doing little happy dances as all of my hard work and planning had paid off! I had the drawer I wanted, and it was working perfectly!!! I added some finishing touches by putting some carpet squares in the drawer and on top of the platform. Then I needed a thumbnail for my video so I climbed into my car and snapped a quick shot. You can probably tell from my smile that I was pretty pleased with myself 😄
I love how the drawer ended up turning out! Project success ✅ I hope you enjoyed reading about my experience and maybe even learned a thing or two!
Quick Shoutout
In my research I was often Googling "How to build a drawer". HUGE thanks to Tylnn as her blog and YouTube video were incredibly helpful in showing the different ways to build a drawer. Check her out!
Interested in following along with my journey more? Follow me on Instagram and subscribe to my YouTube! You can also send me an email at hawkin@hawkinsaeger.com
Until next time!
-Hawkin